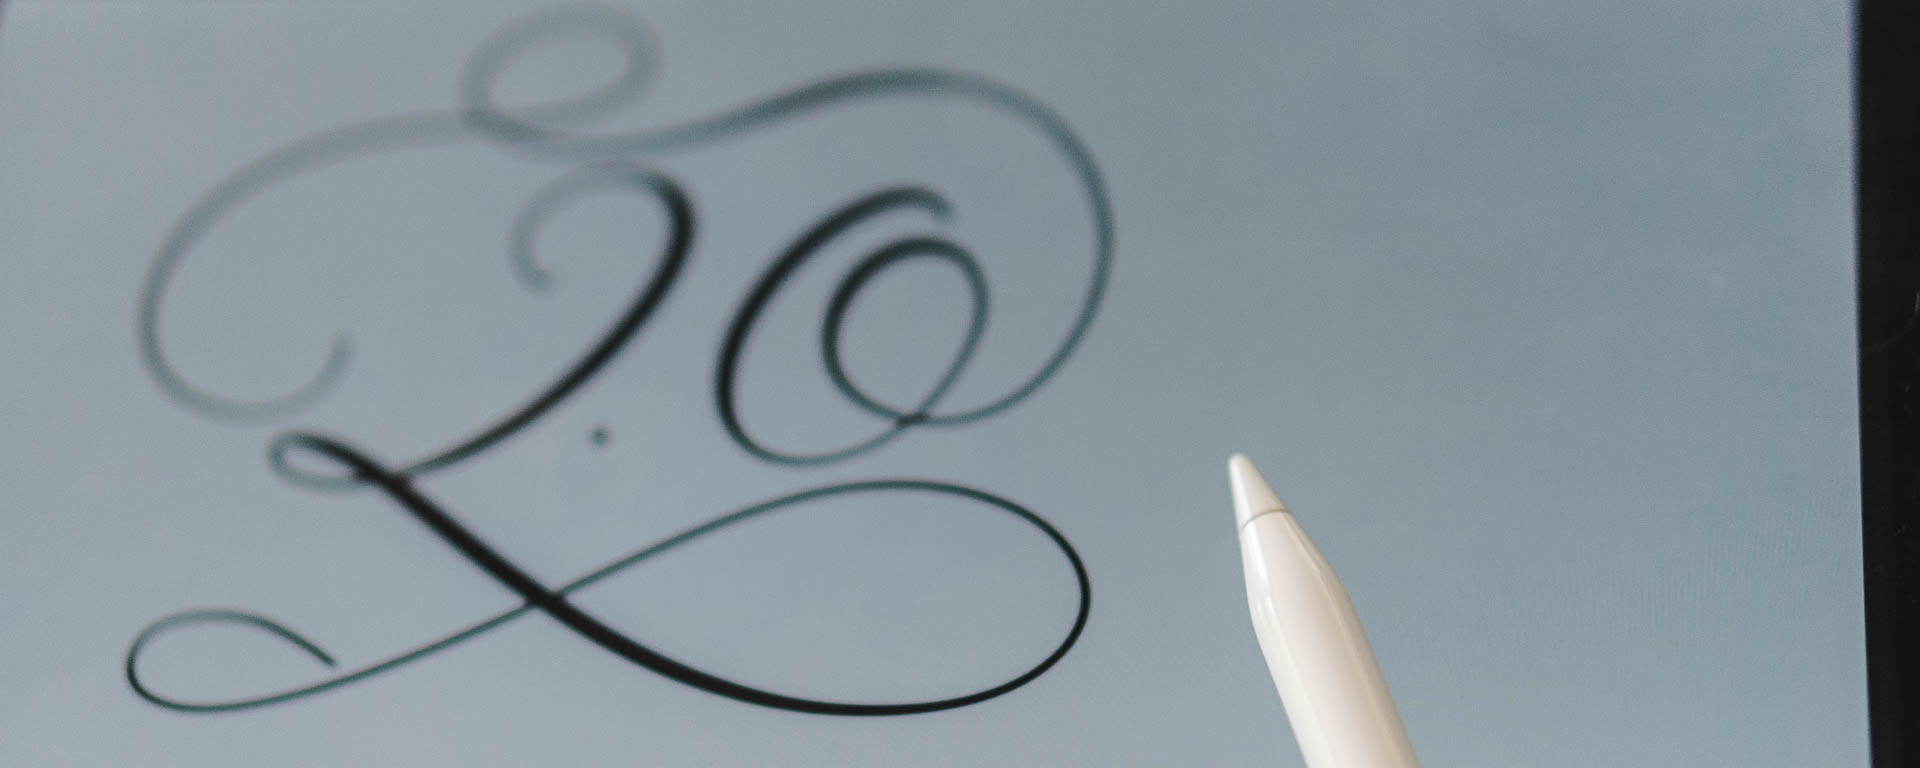
I would’ve never thought that I’d ever buy an iPad. I was sure of the fact that I would never (ever) be in love with an Apple product as much as I still adore my beloved iPod classic (which is still in use!). Well, my iPod is still my number one, but this Pad is definitelly getting there. I’ve only had it for 6 days… Combine the iPad Pro with Porcreate and the Apple Pencil and you got a lettering tool that feels like a real brush upgraded with an undo option.
I did not want to talk too much about the iPad. The Internet is full of great, extensive reviews. The only thing I really want to say is that the Apple Pencil does not feel like a stylus. I’ve used a lot of them. I’m in love with my wacom graphic tablet and would never give that up, but I’ve never been able to create brush lettering with my graphic tablet. With the Apple Pencil and Procreate, this thing just works!
To begin with
I only realized there was such a thing as an iPad Pro and that it is actually an awesome lettering tool because of Instagram. There’s this wonderful person called Karin who created an account just for ipadlettering. But not only did she start this trend, she is also the reason why all of our results are so good. Because she created a brush lettering brush that actually works fantastic! And she gives it away for free! Only thanks to her did I understand how one of the procreate brushes needs to work, in order to be good for lettering. You can get a lot of useful info on her website ipadlettering.com
THE App
The Apple pencil in combination with the standard notes app is already quite impressive, but as soon as you combine it with procreate, this fantastic drawing app, you’ll realize that this thing must actually be made of fairy dust and magic. Unfortunately Procreate isn’t free, but this thing is actually worth a lot more than you need to pay, if I am completely honest. It is worth more than every penny spent.
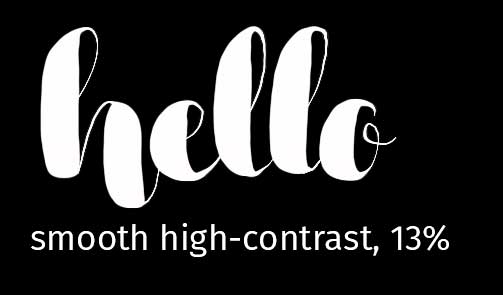
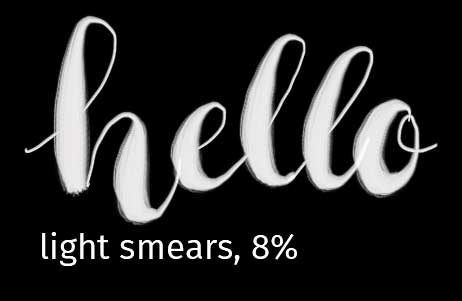
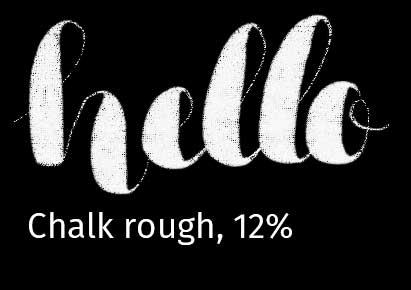
Brushes
The most amazing feature in Procreate is how you can adjust pretty much everything. Within the first two days I mostly tried to create new brushes for myself. I really liked Karin’s Brushes, but I wantet to have a higher contrast between thick and thin. So I worked on that. As soon as I got that down I wanted to create a brush that looked like it was done with a pointed pen. And then I just started experimenting. And since I am a huge fan of the people who share their brushes I decided to share mine with you too, in case you are interested. The previews were all written in a document setup with the retina preset by procreate. The percentages are the brush sizes I used within that document.


Just hit the button below to download. Let me know how you like them if you do get them 🙂
Handlettering Procreate Brushes
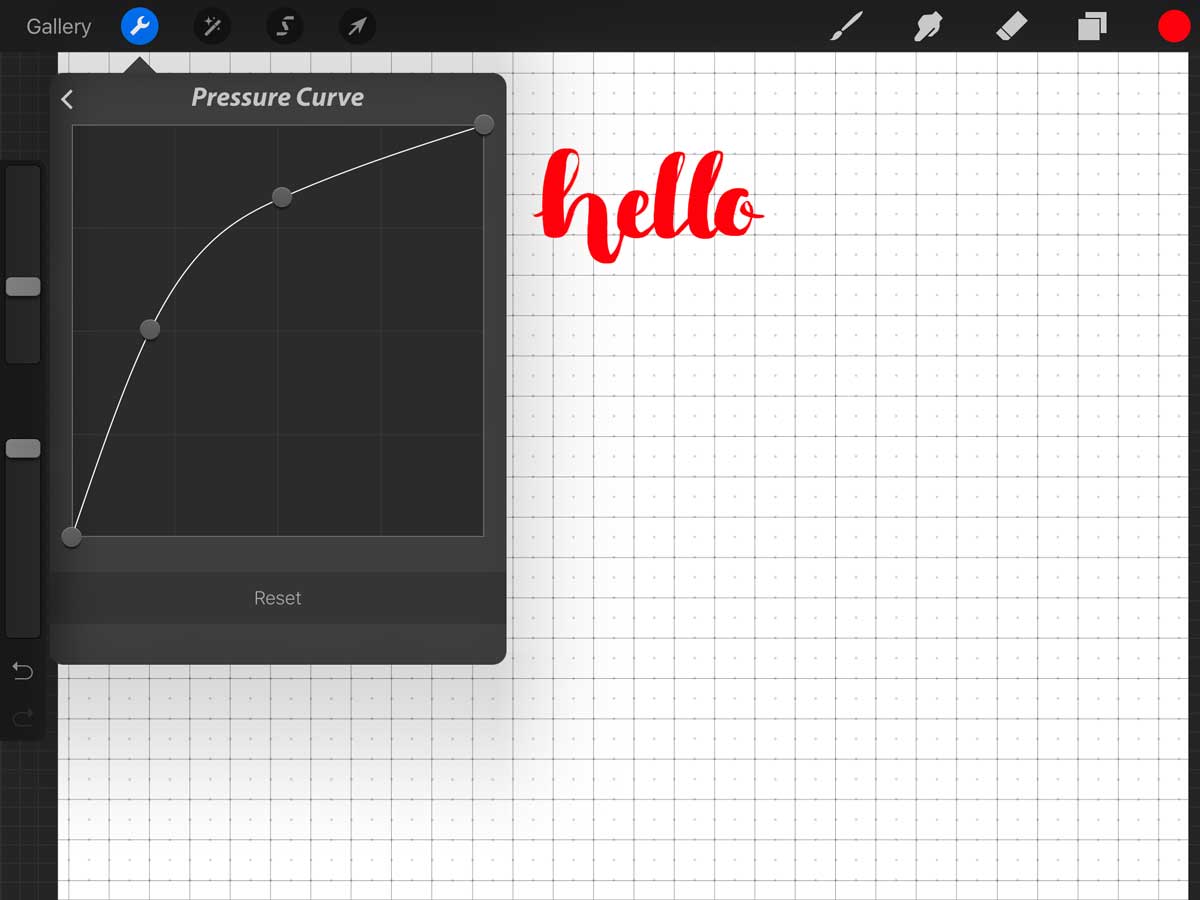
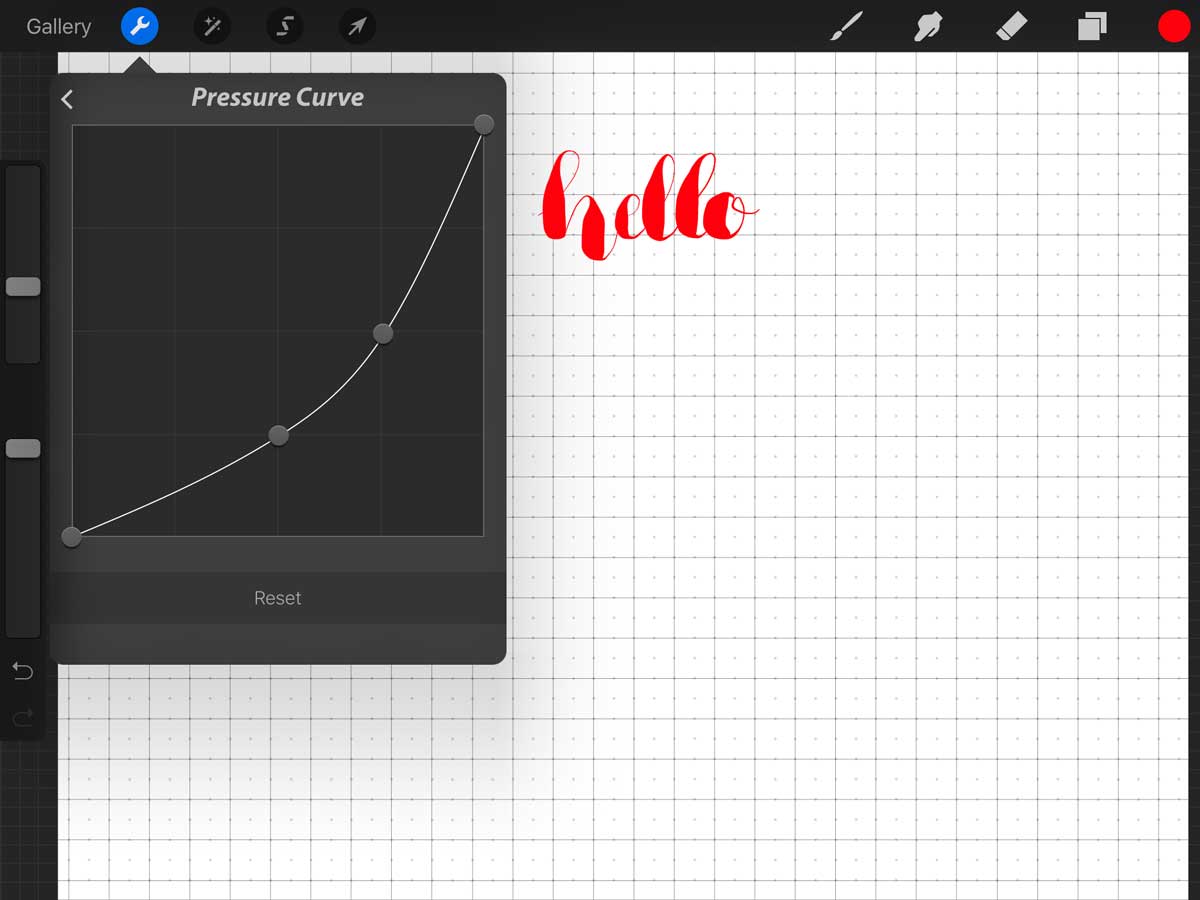
Pressure Curve
Another feature I am a really big fan of is the pressure curve. YOu can adjust how the pressure applied with the pencil will be rendered. Below you can see a few examples. All written with the same brush, same kind of pressure applied. But the curve is different. My personal curve is the last one, I feel like it gives me a contrast that is a tiny bit higher than the default.


I am totally in love with this new toy of mine and I feel like the whole lettering thing can be taken to a new level by creating it digitally like this. YOu do save a whole lot of paper and scanning time with this. Unfortunately Procreate is not (yet) able to create vectors, so for my font I still need to go over a vectorizing process, but all of the steps before that are so much easier now.