
We all love them. We all crave them. We all want to achieve suuuper thin hairlines. When I first saw delicate calligraphy written with a 303 nib I was in awe! But how on earth was I supposed to achieve that when I was so heavy-handed? Well, I decided to work on it and less than a year later, hairlines is what people most often compliment me on. Today I want to share a few tips that I’ve learned to make hairlines thinner and prettier.
Tip No. 1: Choose Paper and Ink wisely
Tip No. 1: Choose Paper and Ink wisely
It might seem almost too simple, but often times people feel like they are super heavy-handed but in reality they are using bleeding paper. If you are using absorbant paper the ink will spread more, and give you the appearance of thicker lines than they actually are.
As soon as you upgrade from cheap copy paper to non-bleeding paper like the Clairfontaine brand, Rhodia, Oxford, Canson or Tomoe River your pens will glide over the smoother surface of the page and the ink will stay where you put it, giving your lettering an instantly better look.
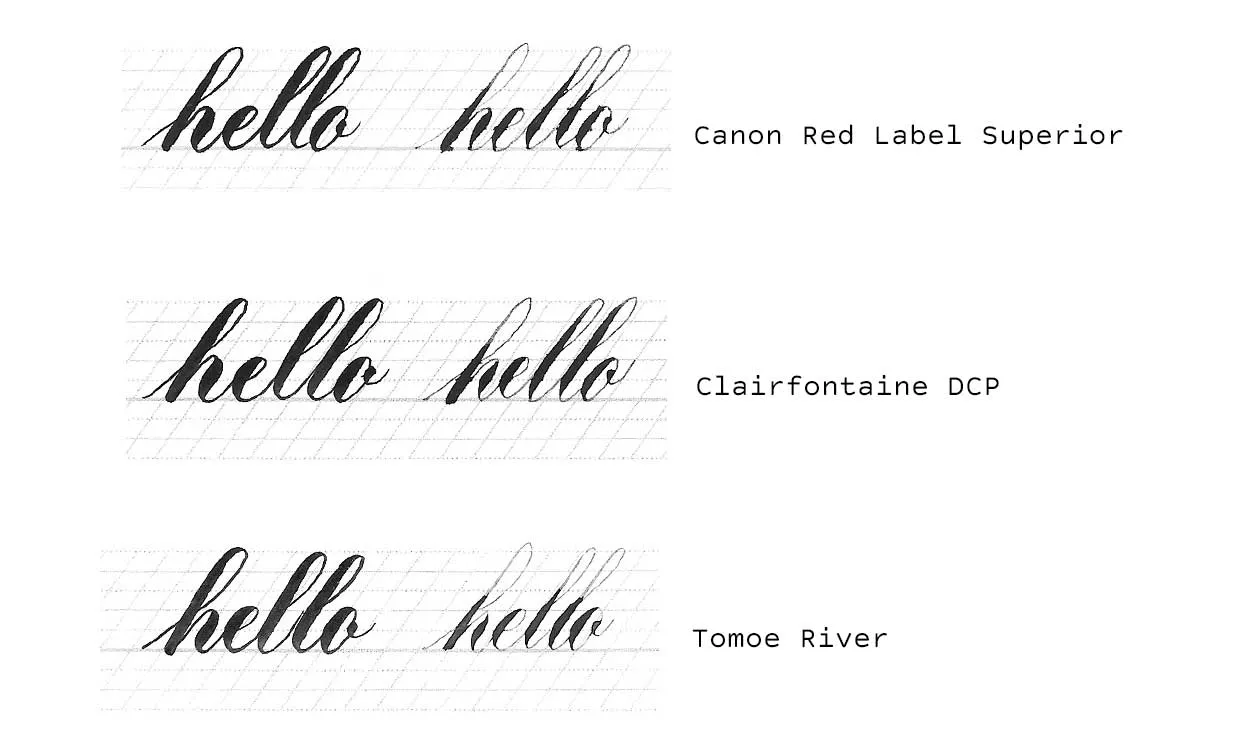
For brush pens you might be able to get away with cheaper paper than with nibs for calligraphy, as you can see in the scans of 3 different papers below. Pen was the Tombow Fudenosuke soft, Nib + Ink Gillott 303 with Higgins Eternal. All of these were written with the same amount of pressure.
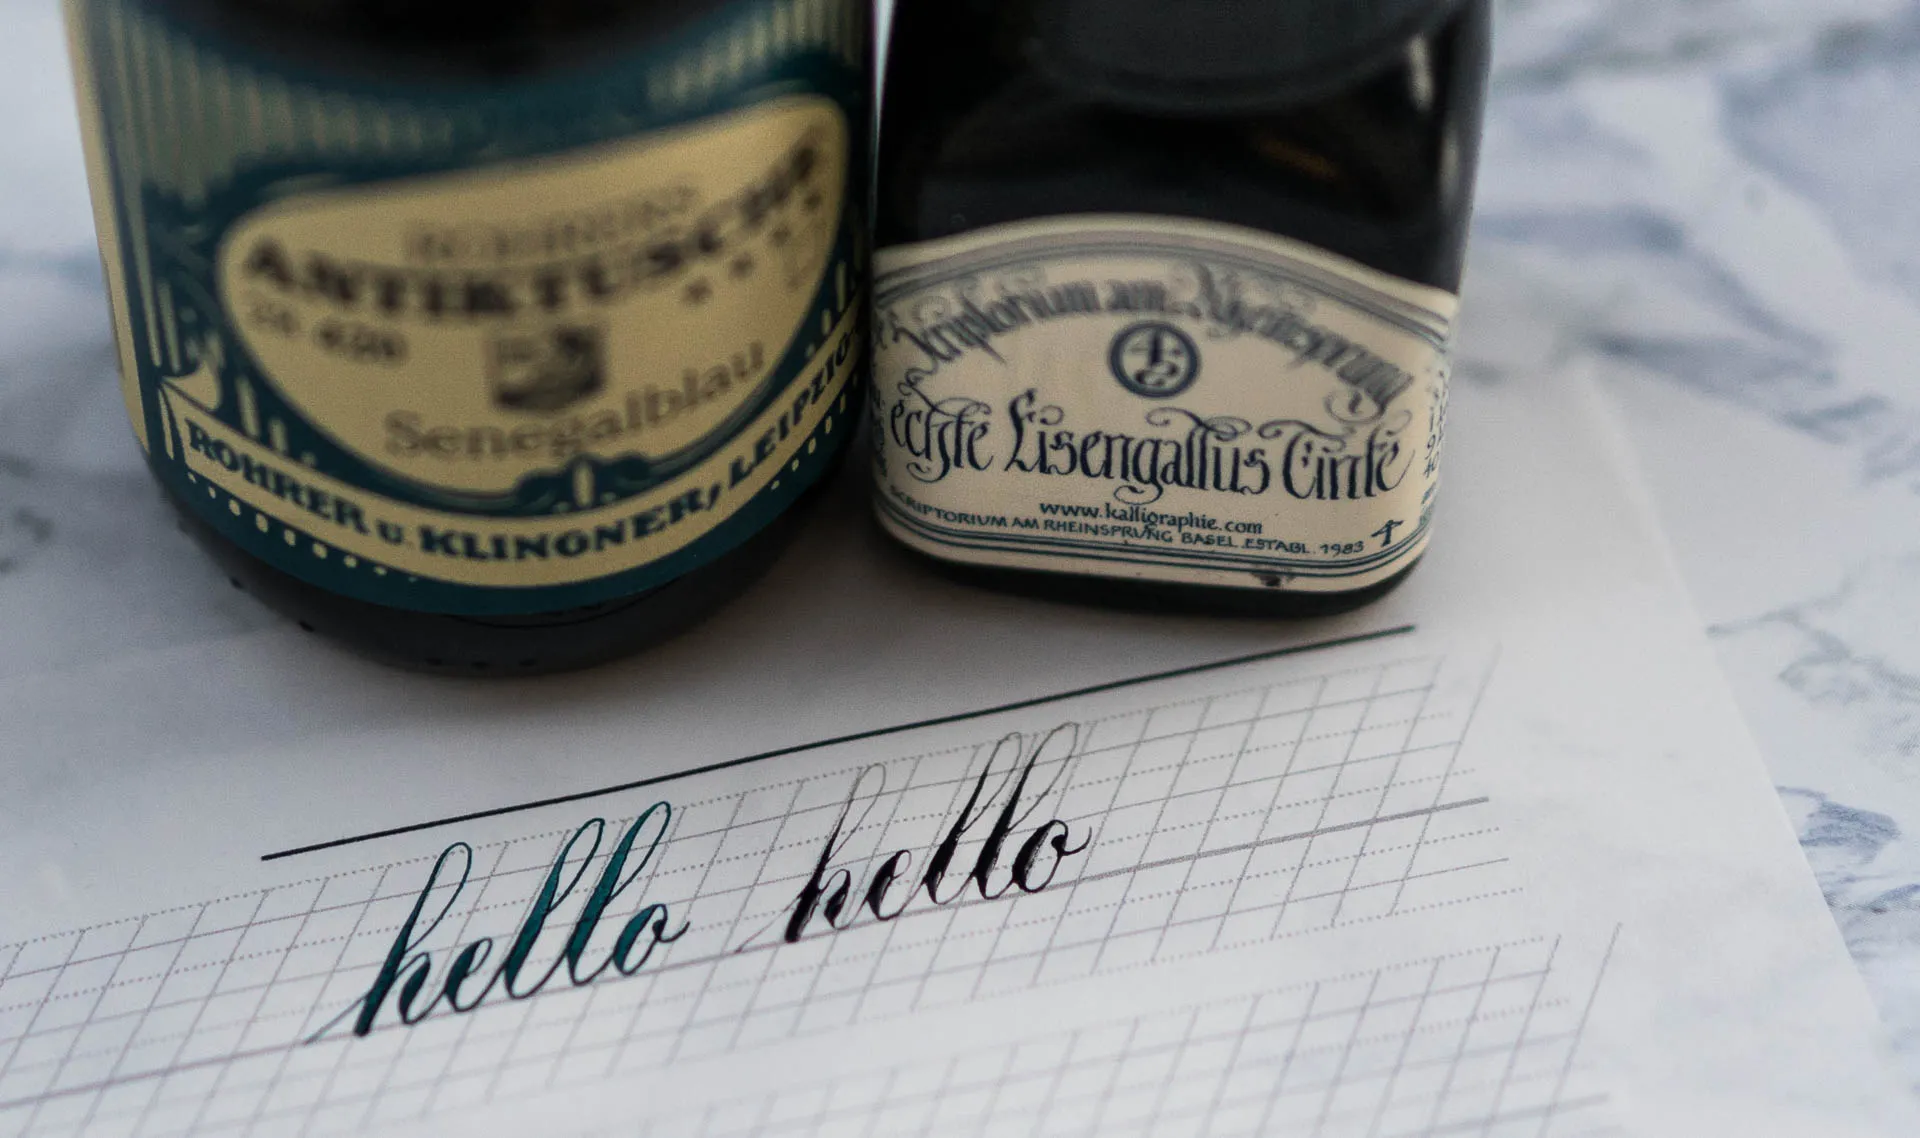
When it comes to ink and Calligraphy a lot of people don’t realize that the ink does impact your hairlines, using thinner inks like Iron Gall, Walnut, Higgins or Ecoline will give you much thinner hairlines than acrylic or pigmented inks.
In the picture below you can see Rohrer and Klinger Tusche vs. Iron Gall ink, written with a Perry 28 nib.
Tip No. 2: Don’t be so heavy on your downstrokes
Tip No. 2: Don’t be so heavy on your downstrokesThis was one of my personal biggest mistakes. I used to want extreme shades. The problem with that is that you will mentally prepare yourself to press real hard and that will affect your hairlines. Lightening your downstrokes might reduce your contrast at first, but just by mentally lightening your shades your hairline gets lighter and the overall look will be more delicate. Also by not pressing as hard, the amount of weight that you have to lift up again is less. That means that you have to release less,Even so by lifting the same amount you’ll still get finer hairlines because the initial line was less heavy. Maybe your contrast will be less extreme at first and your hairlines just minimally thinner, it will improve the overall look by making it less bulky.
Tip No. 3: Hold your pen at a steeper angle
Tip No. 3: Hold your pen at a steeper angle
Holding your pen higher up will automatically make step number 2 easier. By holding the pen higher up, less of the tip will rest on the page by default, thus a thinner line results easily. You might find this super weird at first, but within a few hours it’s gonna feel natural. This rule applies to all kinds of pens, but it will feel most different with a nib, the nib will automatically feel stiffer and give you more sense of control.
The amount of lifting the pen depends on what type of pen you use. I use brushes completely perpendicular to the page, my nibs pretty high up an brush pens and fude pens pretty low still, because using those too steep can cause you to ruin the tip, because they are just not manufactured to be ued at a very high angle, I still hold them a lof higher than I see a lot of people use them on Instagram.
Let’s talk more long-term
Let’s talk more long-termOkay, the next two tips are to not just to improve your hairlines but give you an overall better look. These tips will give you nicer letterforms, but they are not instant. They entail investing time in practice and mental reprogramming of how you write your letterforms. They take time to get accustomed to, but ultimately those steps are really worth it.
Tip No. 4: Lighten your hand
Tip No. 4: Lighten your handThis might be the first obvious tip someone would give to have better hairlines. It is the easiest and the hardest tip, because if you are super heavy-handed it is very very hard to lighten up. But let me tell you, even though you think that is something coming from your hand, it is acutally a mental thing.
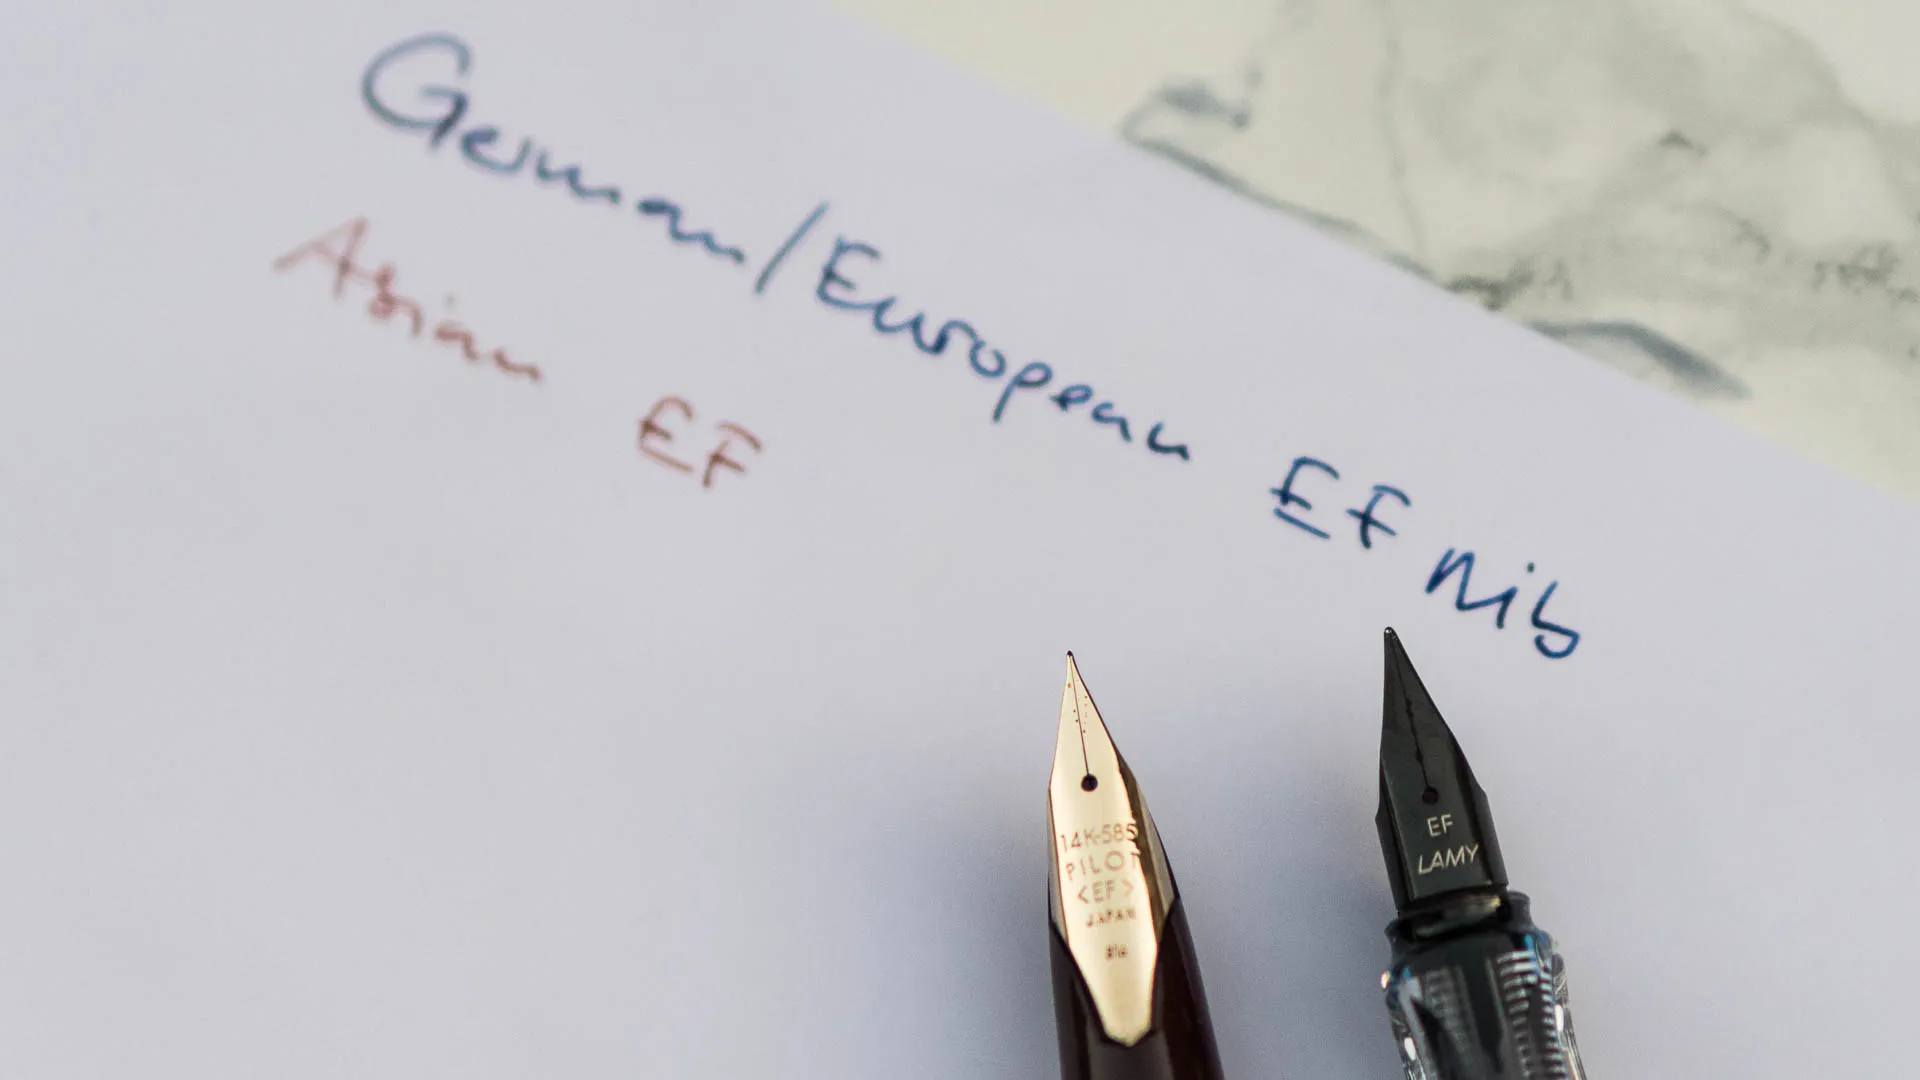
If you are heavy-handed chances are, you are a ballpoint user in every day life. We all know the struggle when a ballpoint stops working and our natural instinct is to press harder. My first tip in getting a lighter writing hand is actually switching to a fountain pen with an extra-fine nib in every day writing. And I mean an asian Extra Fine, not a German/European. Getting a super cheap one like a platinum preppy (which I unfortunately no longer have since I gave mine to a friend) is the best option. A platinum preppy is more on the scratchy side and when used with a heavy hand this fountain pen will not write as smoothly as a lighter hand. This basically forces your brain to reprogramm itself. Lightening the hand will improve the writing experience.
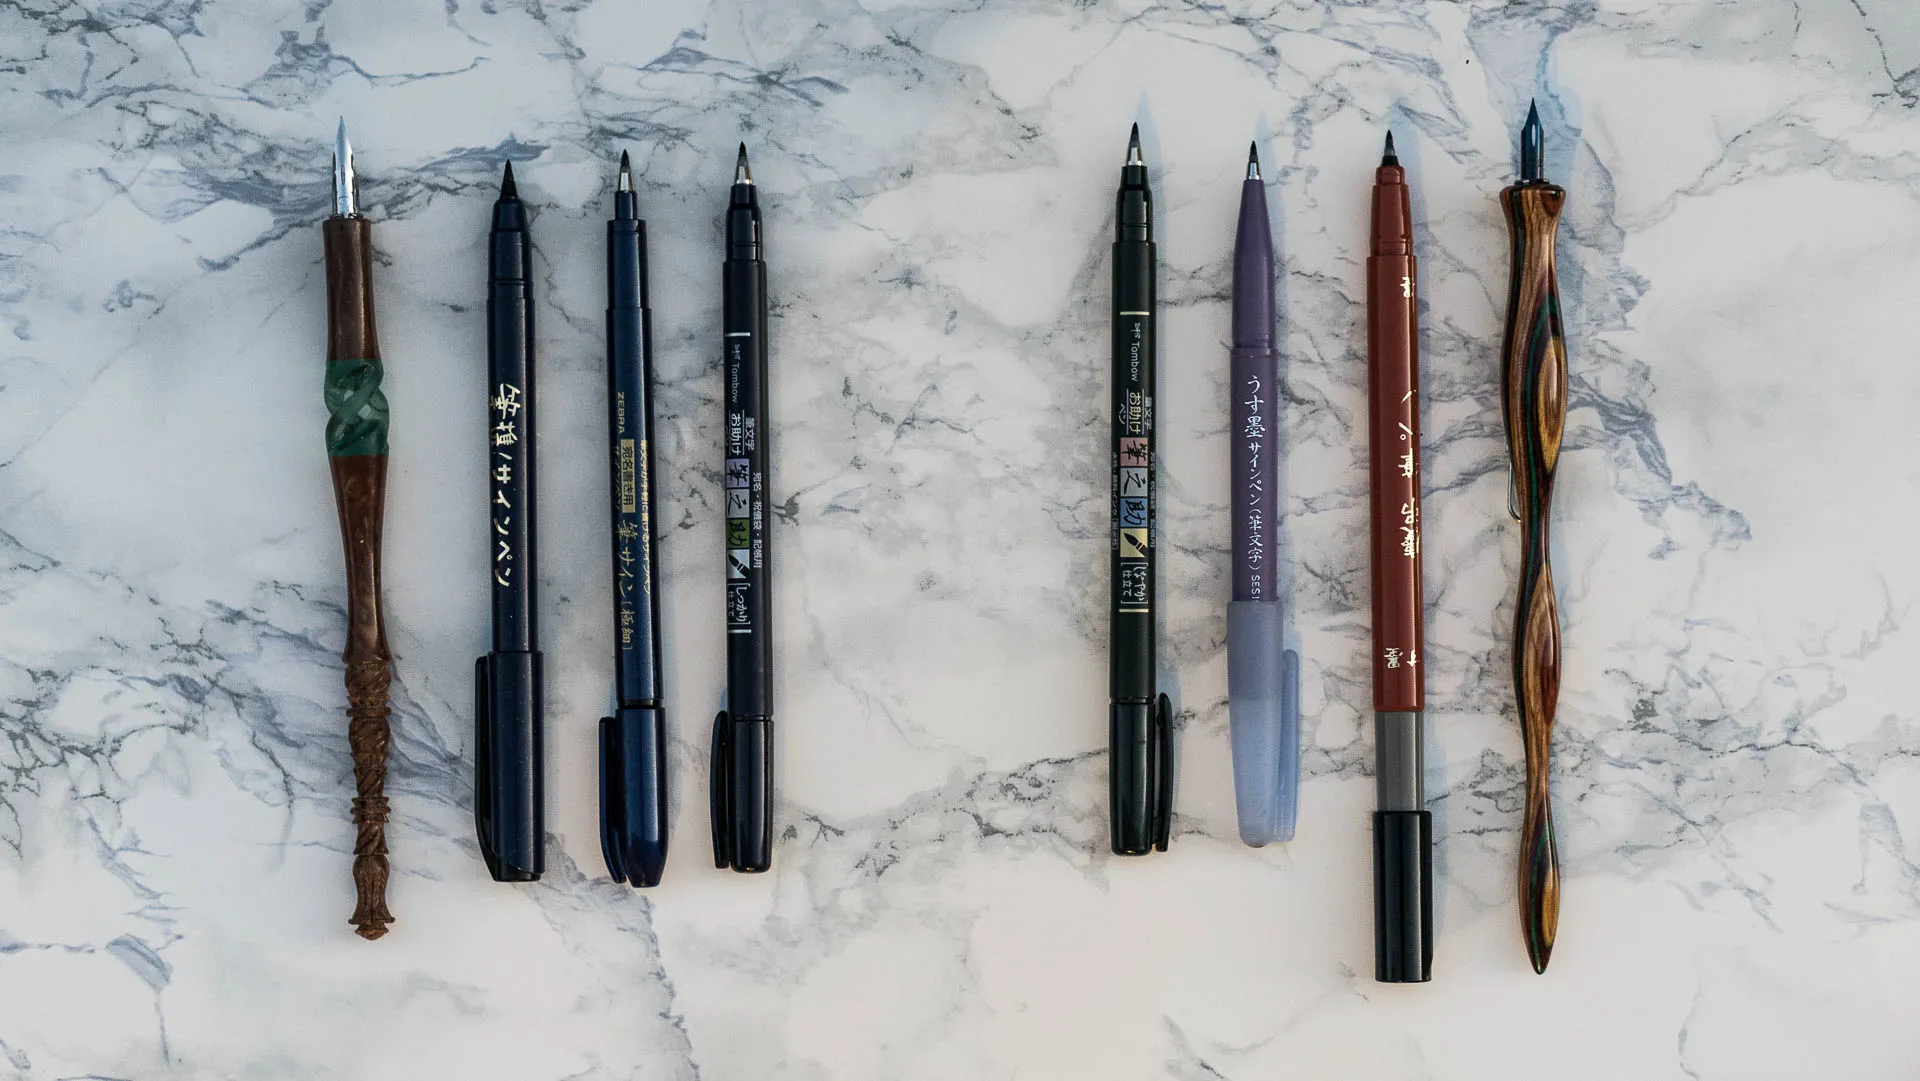
Using pens that are more flexible will also really help with lightening up. By switching your nib from a G nib to something like a hunt 101, leonardt principal or Gillott 303 you will be forced to lighten up because the paper fibres get caught in the nib with more heavy pressure. Switching from a synthetic to a real hair brush or from the tombow fudenosuke hard to soft will have a similar effect. By learning to control more pressure sensitive tools you will become more aware of the amount of pressure you apply onto the page and become able to focus your mind on it. Being aware is the key to mentally being able to get lighter-handed.
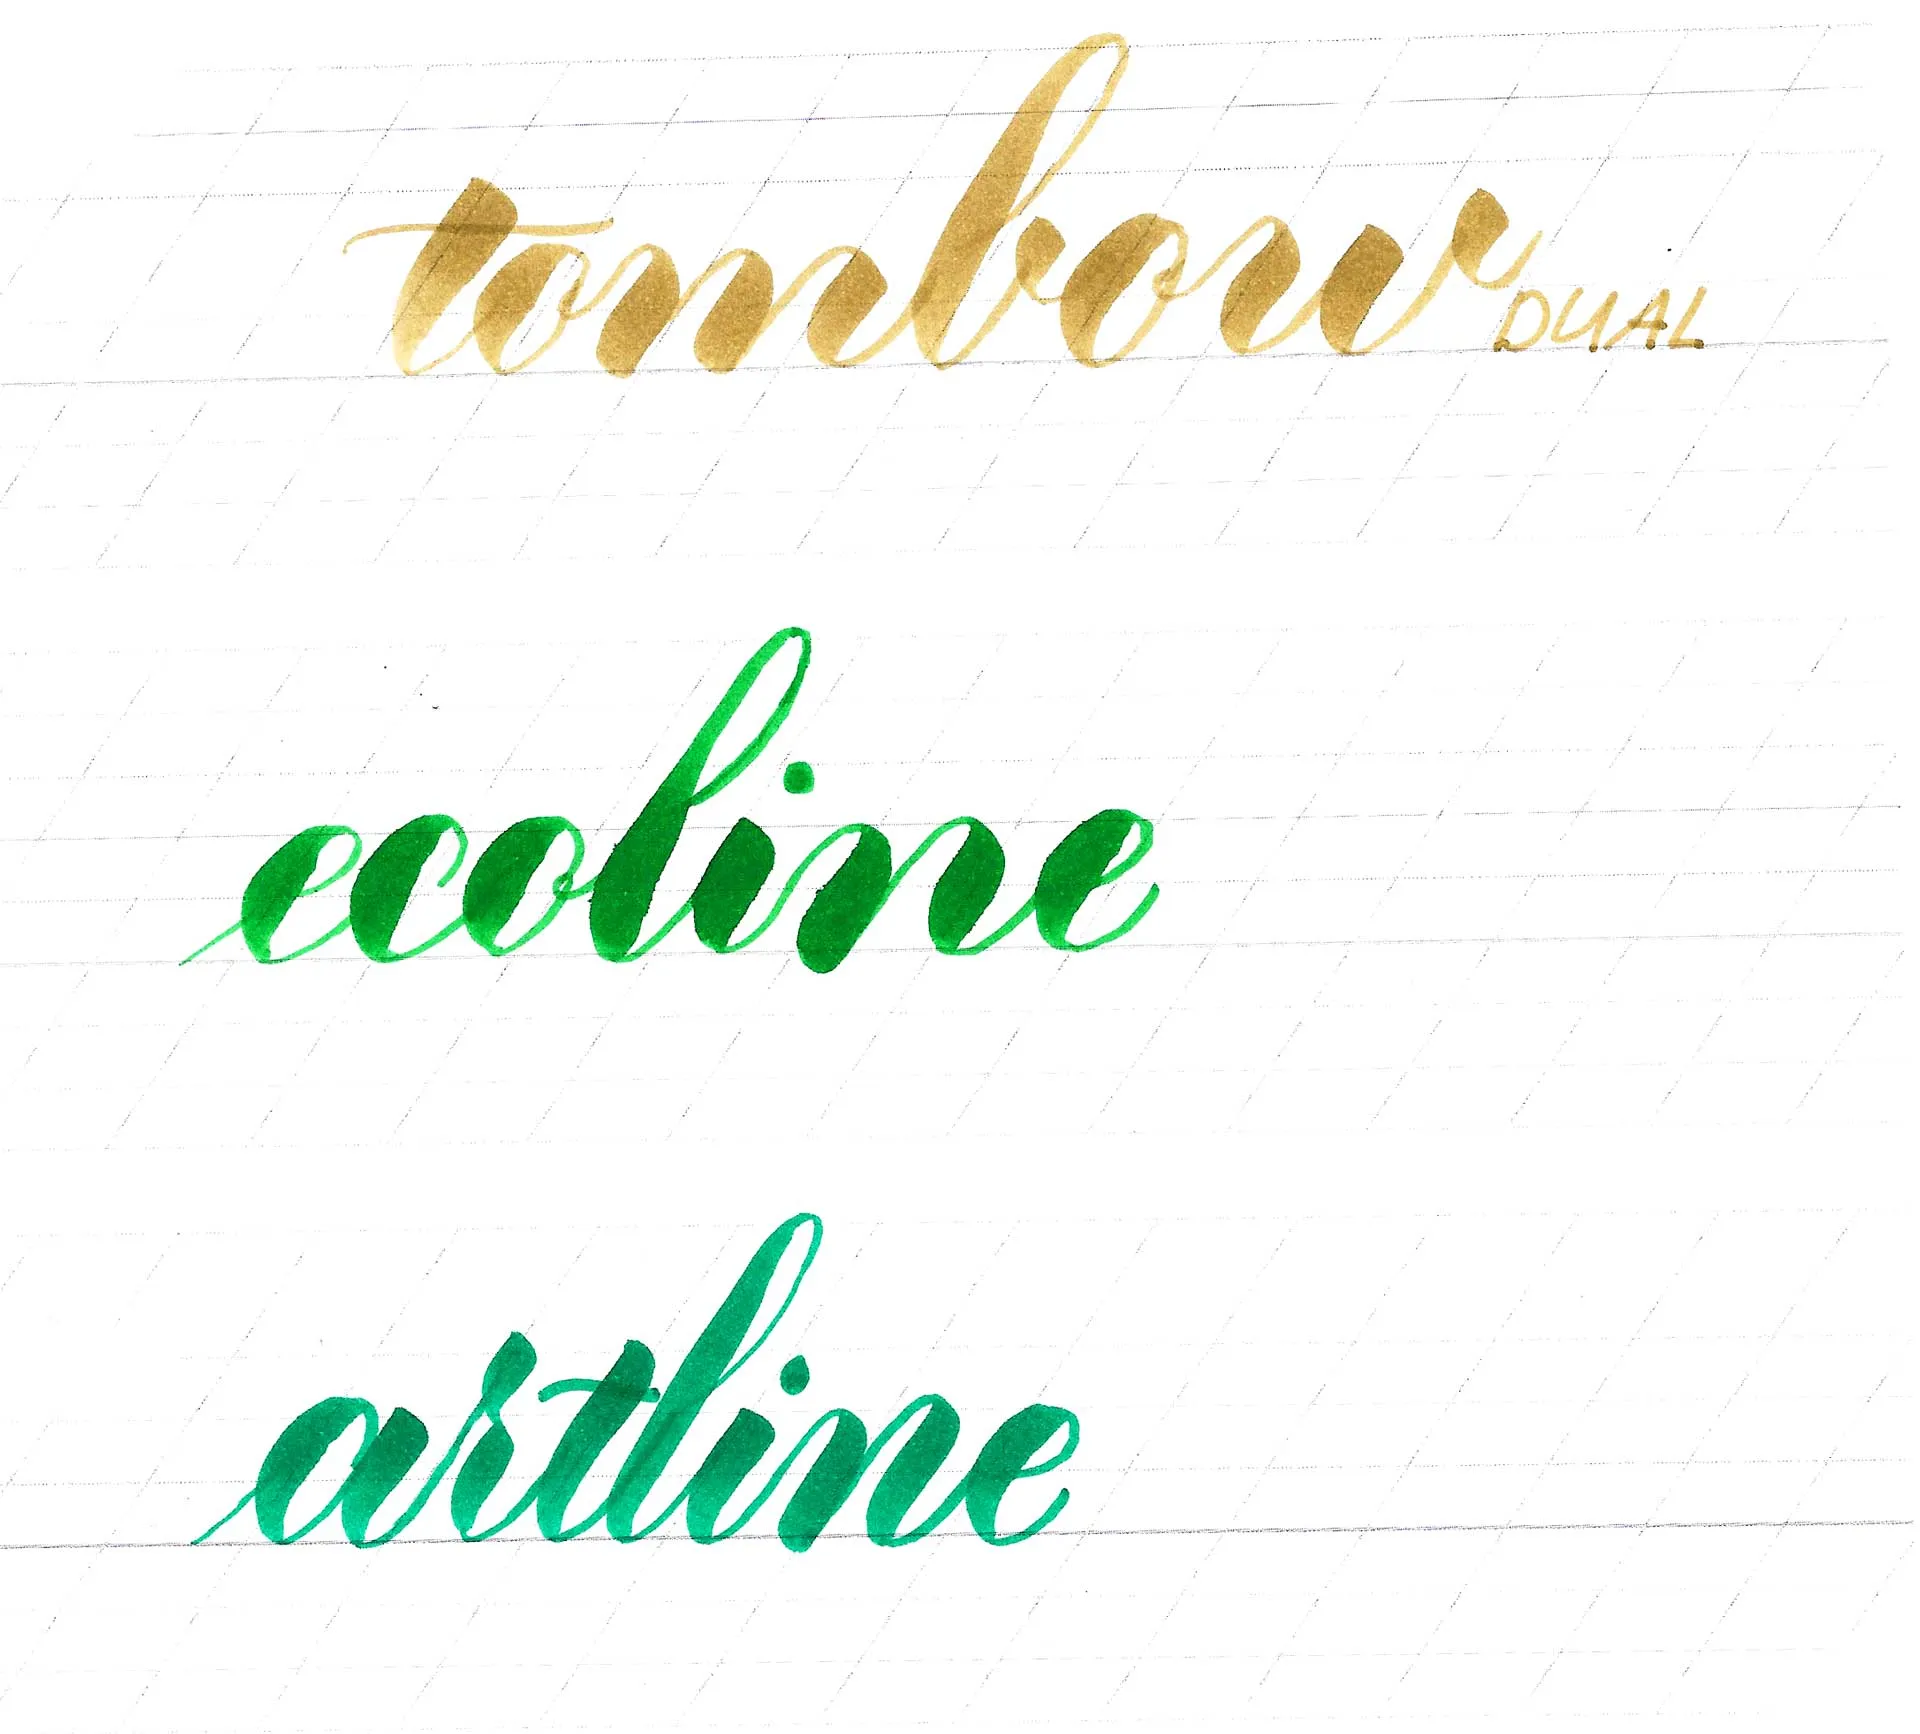
Also - know what to aim for, different pens have different tip widths. As an example, an Artline Stix Brush pen is much less pointy than a Tombow, thus the hairline can never become as thin as that. On the other hand, a Tombow is extremely pointy, it can actually write thinner hairlines than the bullet tip end. You want to be aware of the fact though, that a frayed brush pen will write thicker. This is why I never recommend practicing this with all Tombows you have and then when you know how to write super thin hairlines you’ve worn all your pens out and have to replace them, so that they can be used to their full potential.
Tip No. 5: Lift and Press right before and after Curves.
Tip No. 5: Lift and Press right before and after Curves.This last tip has actually nothing to do with your actual hairlines but it will give your letters the apperance of thinner strokes.
Let’s look at the basic strokes that make up the lowercase script letters, how I see them written on a lot of peoples feeds, that have asked me for hairline tips.
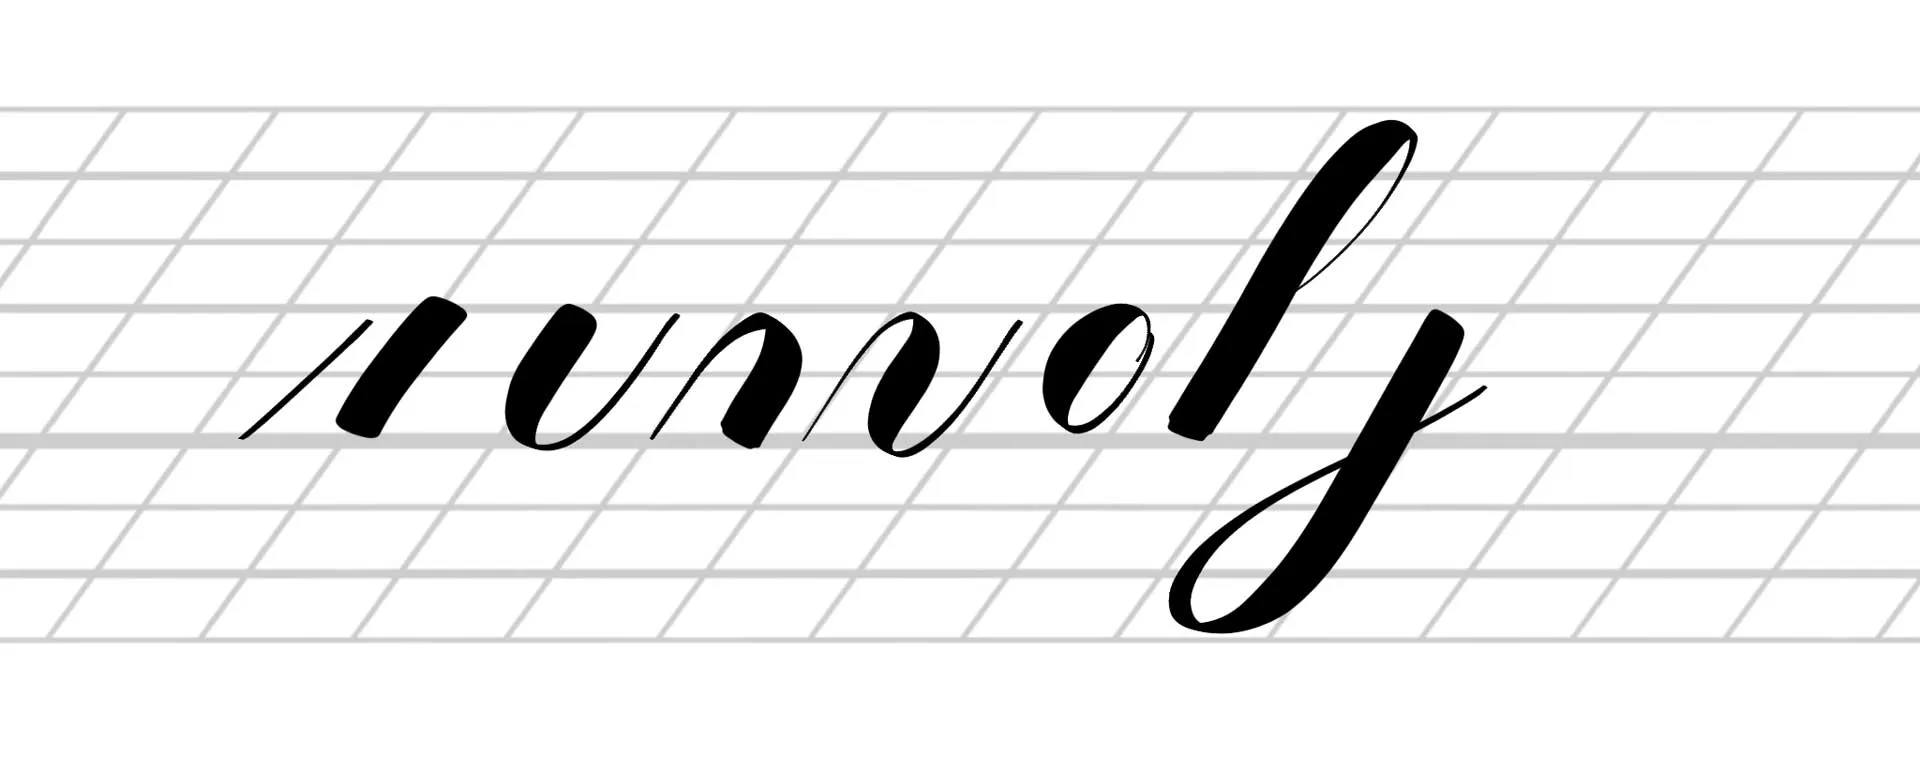
The problem is evident in the turning points.
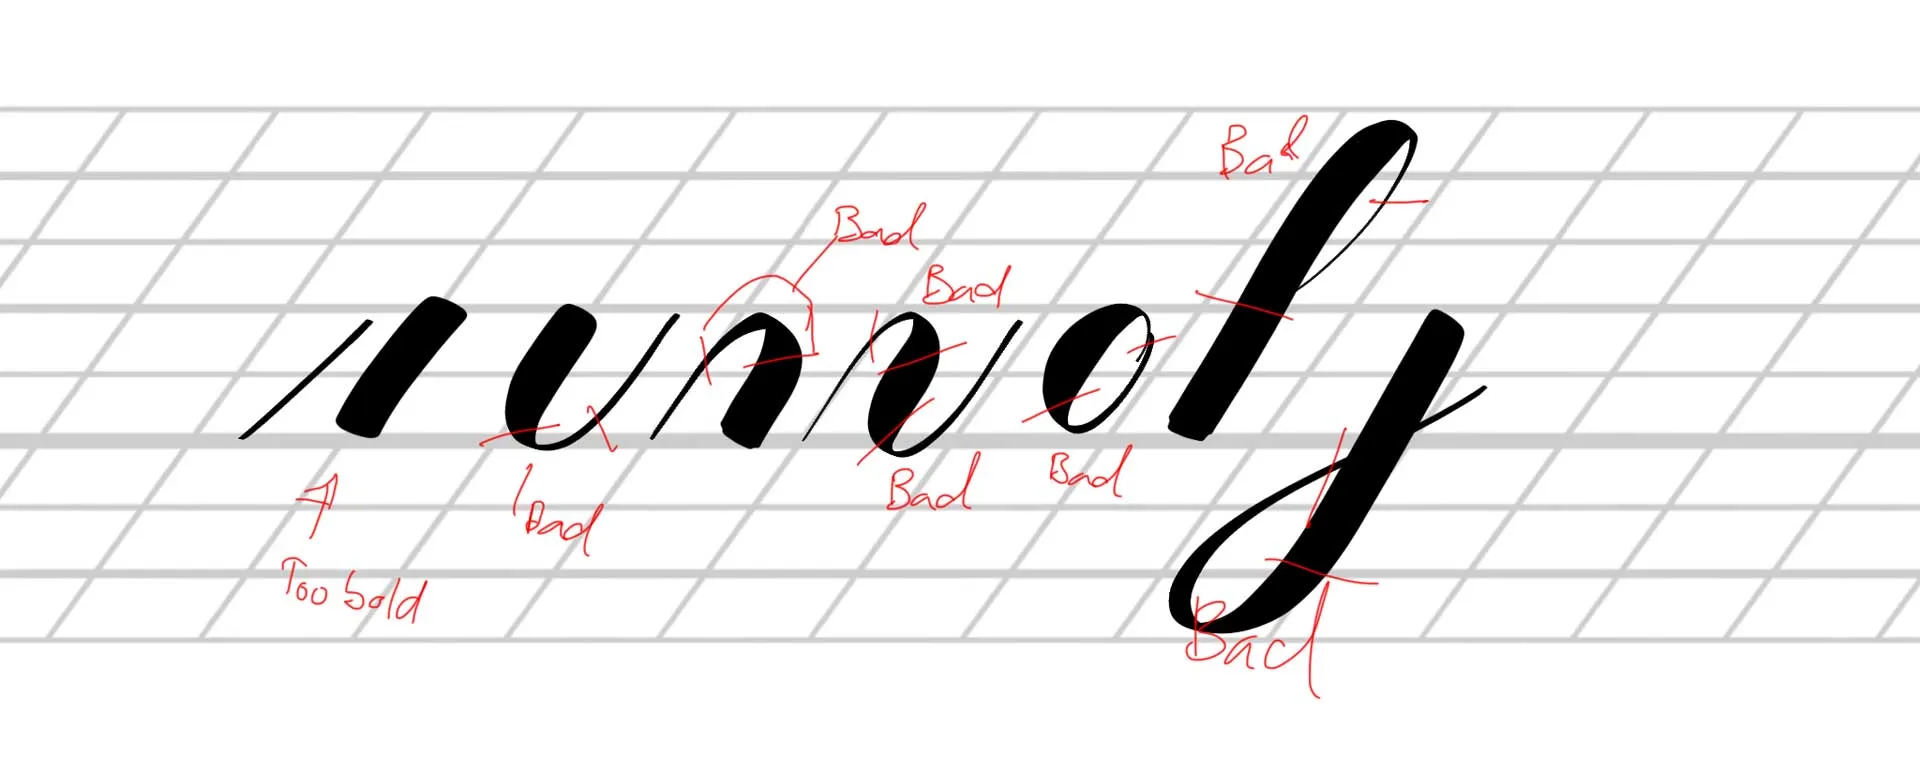
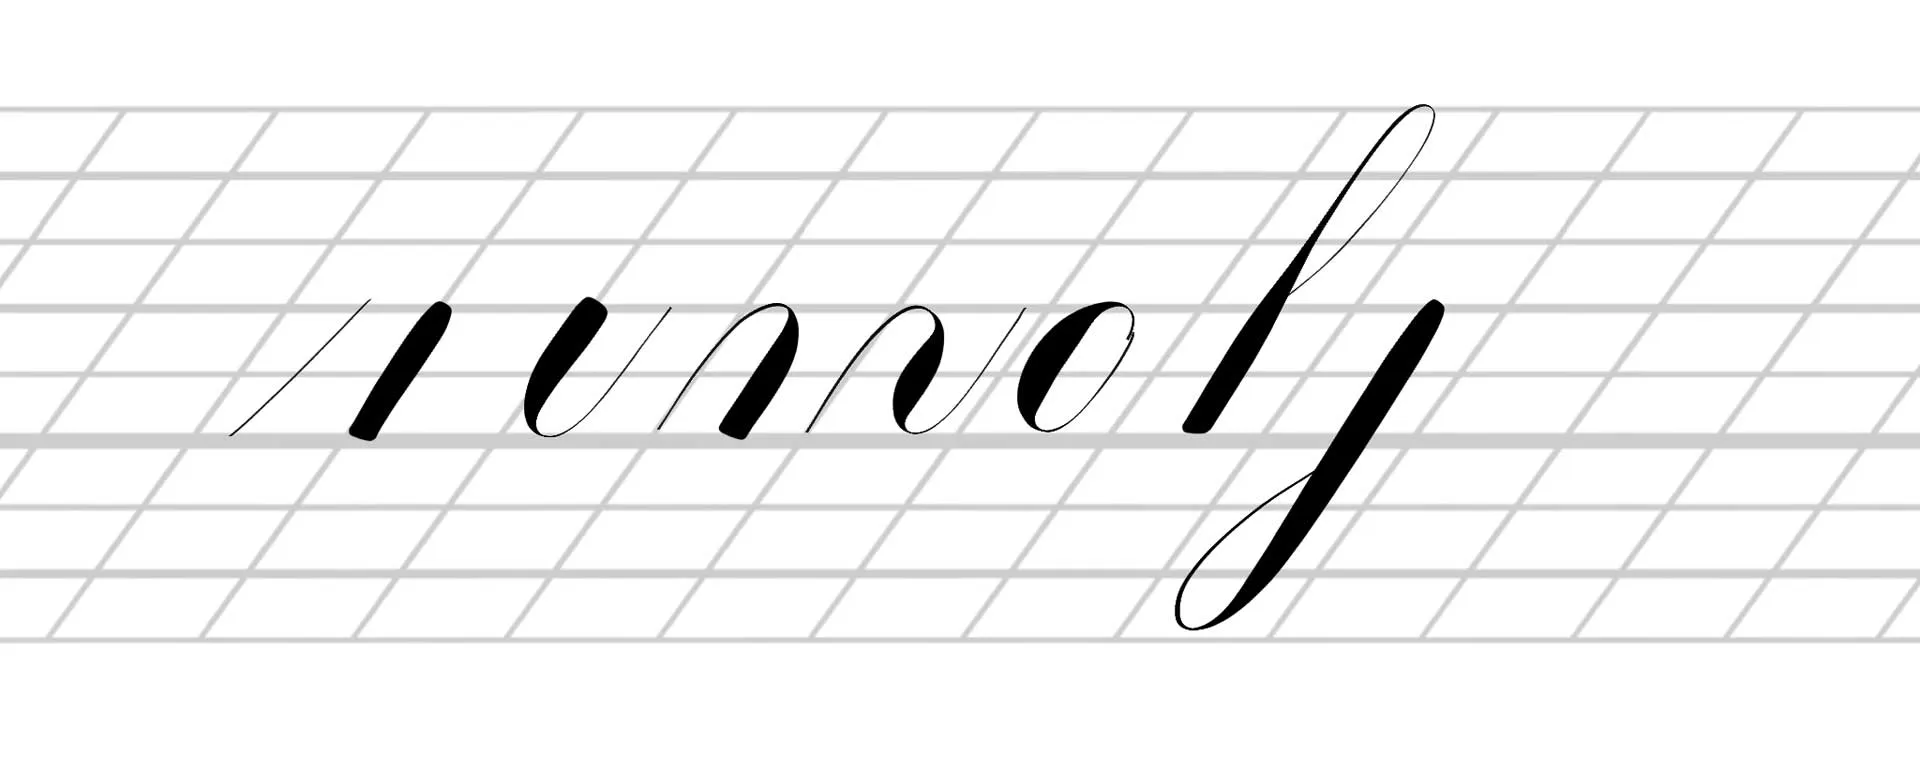
Often times people will only lift their pens after the underturn or start applying pressure while they are doing the overturn. By actually stopping earlier with underturns or only starting to add pressure after the overturn you’ll automatically achieve a more stark contrast, the lines will look cleaner and more defined, because the pressure will be changed on a straight line and not on a curved one, it will appear less gradual and even though the hairlines might remain the same thickness, they appear thinner because all of the hairline is the same thickness.
Tip. No. 6: Practice Practice Practice
Tip. No. 6: Practice Practice PracticeNo Master falls from the sky. No calligrapher is born perfect. You will only improve with constant repetition, beautiful calligrpahy is hard work and not talent. Just keep at it and you will master the thin hairlines with time.