So a while ago I stumbled upon PVC Pipe Pen Storage Solutions on Pinterest. It’s a pretty popular solution for storing Copic Markers, which like any marker actually, should be stored lying down, instead of standing. The whole horizontal pen storing was something I wanted to look into since I had noticed that my Tombows were starting to feel dried out sometimes, but as soon as I laid them down a bit, they felt a lot better. So this was my main inspiration to go look for alternatives, thus my hour-long browsing on Pinterest. So after a couple hours of research I decided to lock in the following weekend for this pen storage project. This is how it went down.
Since I don’t own a saw and this endeavor required pretty extensive sawing I decided to start this thing at my parent’s and let my dad know, that I’d be in need of his hand saw. But first I needed to get myself some pipes.
Materials
MaterialsI did not reference a tutorial for this, and I did not plan how many exact pieces I needed, but I made a general plan for my storage pyramid. I knew that I had half of my above the desk rack of space and pretty much unlimited space up. For the piece length I wanted a full Tombow to fit in there, so that meant pieces of 20cm length.
In the store I found 2m PVC pipes with a 7cm diameter. One of those pipes cost me just under 10chf. I got 3 of those, since I have a pretty extensive pen collection.
I also got some strong hot glue (since I had high temperature glue guns already, but no actual hot glue). For this project you want high temperature glue, not the low temperature kind, since you want a strong bond.
And I also got some sanding paper in No. 180 and 320.
Cut & Sand
Cut & SandAs soon as we came home, I wanted to get to work with a hand saw (which I’m sure works just fine) but my father offered to cut the pieces with his electric circular saw which meant the cutting was done in under 10 minutes.
Because those tubes are meant to attach to other things, there are some off-cuts that can’t be used for this project, but I still ended up with a pretty good amount of pieces.
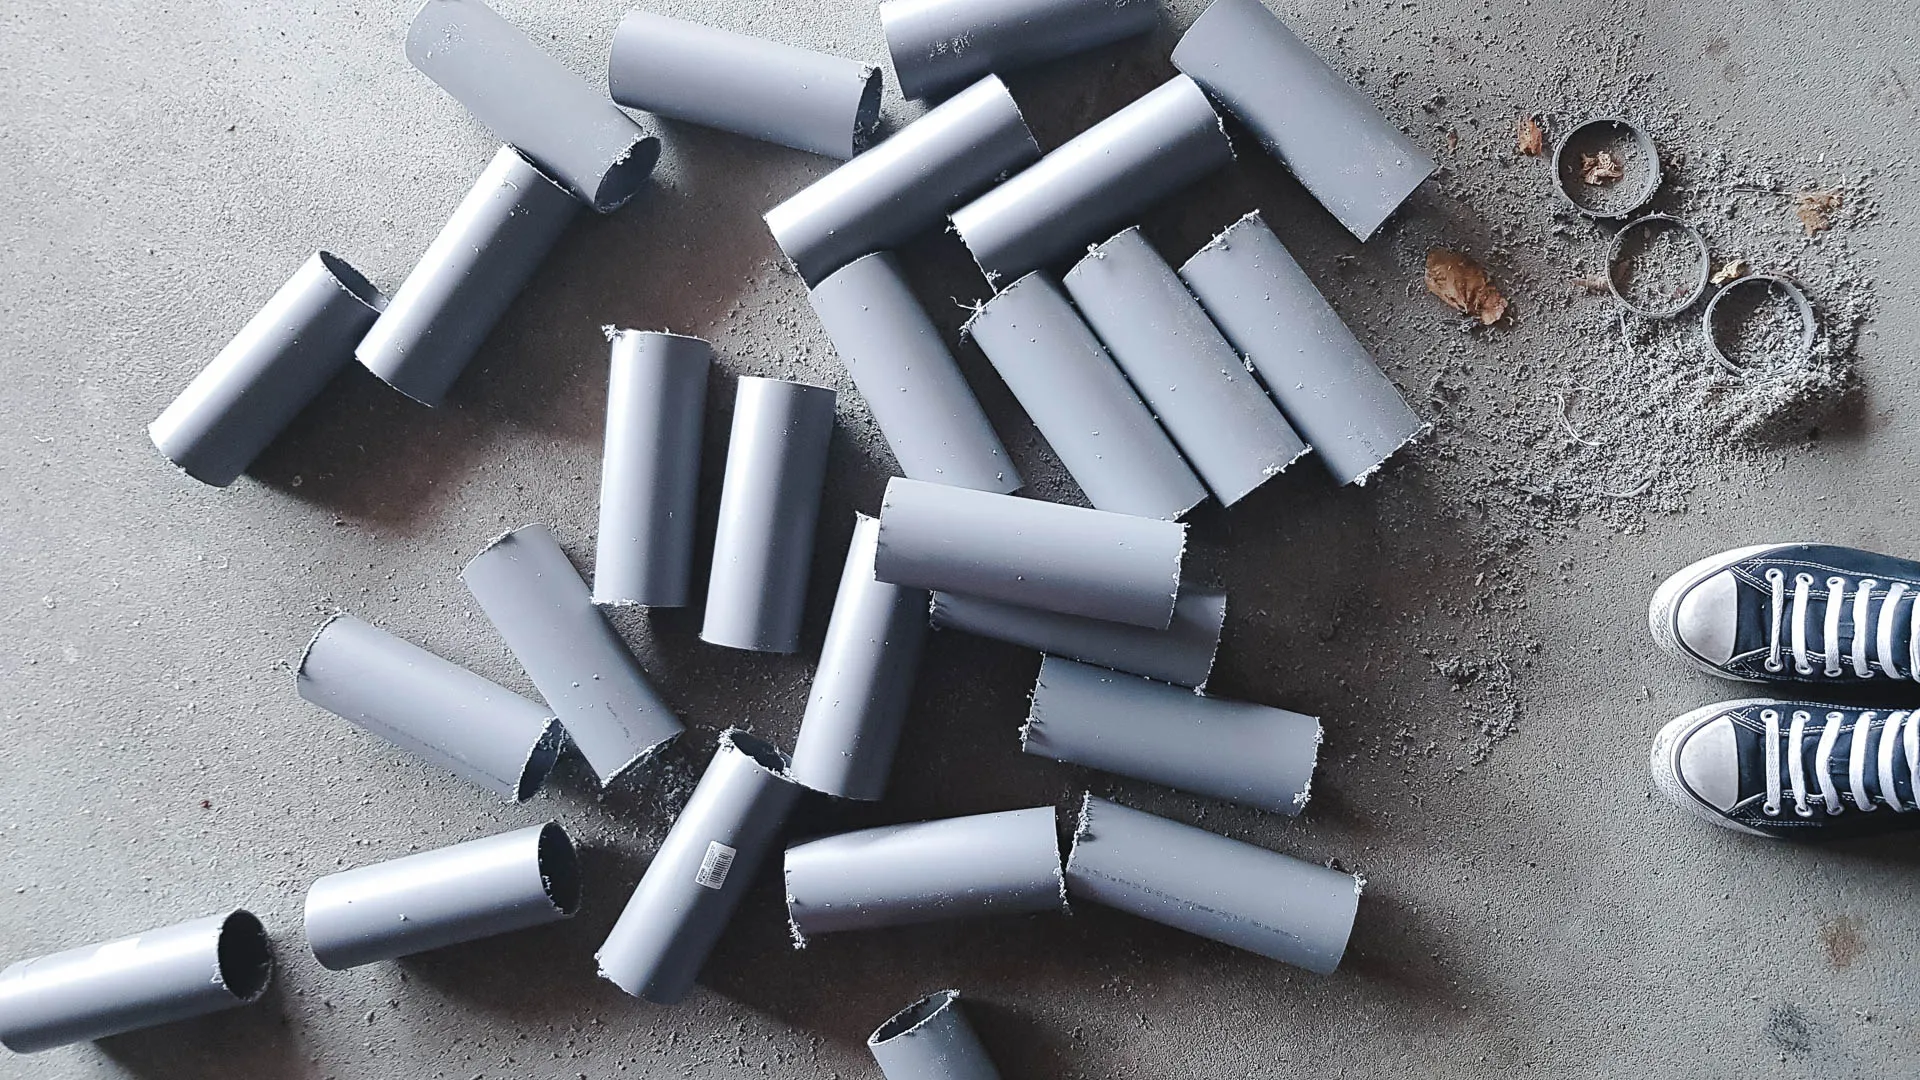
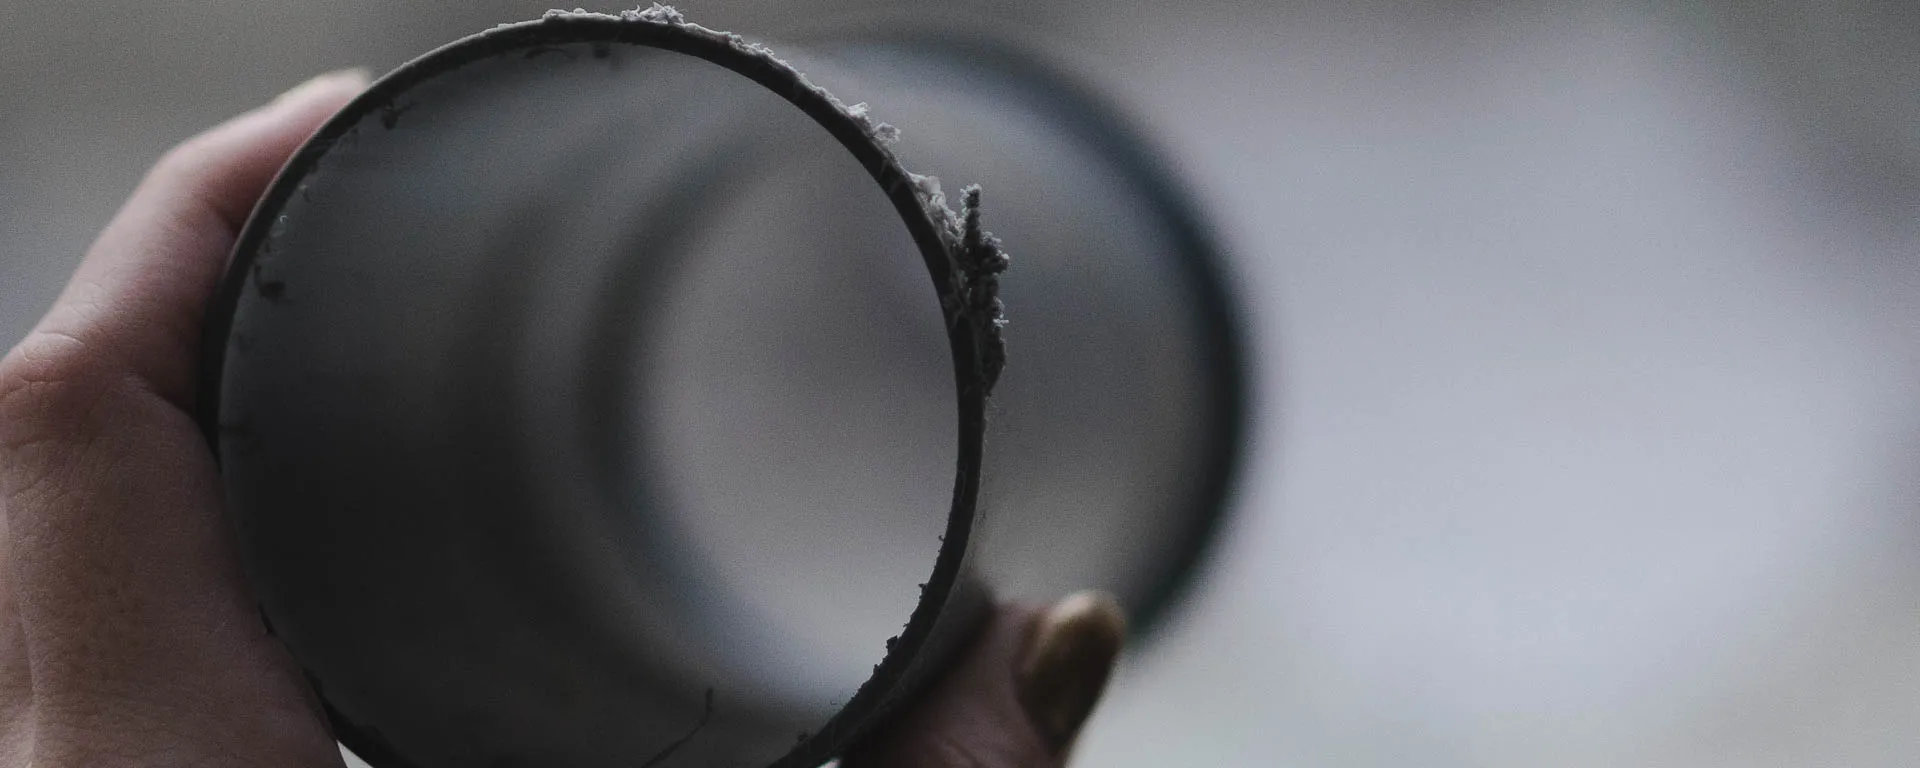
As you can see the saw left the edges quite jagged, so next step was sanding all of these pieces so that the edge was fairly smooth. I am not that patient, so I probably stopped earlier than some people would, I just wanted those pieces no longer rough feeling, and then I was fine with it.
After that was complete the whole schlepping those pieces home part happened, which got me a few weird looks in trains and busses, but we don’t care because we end up with a nice storage.
Assembly
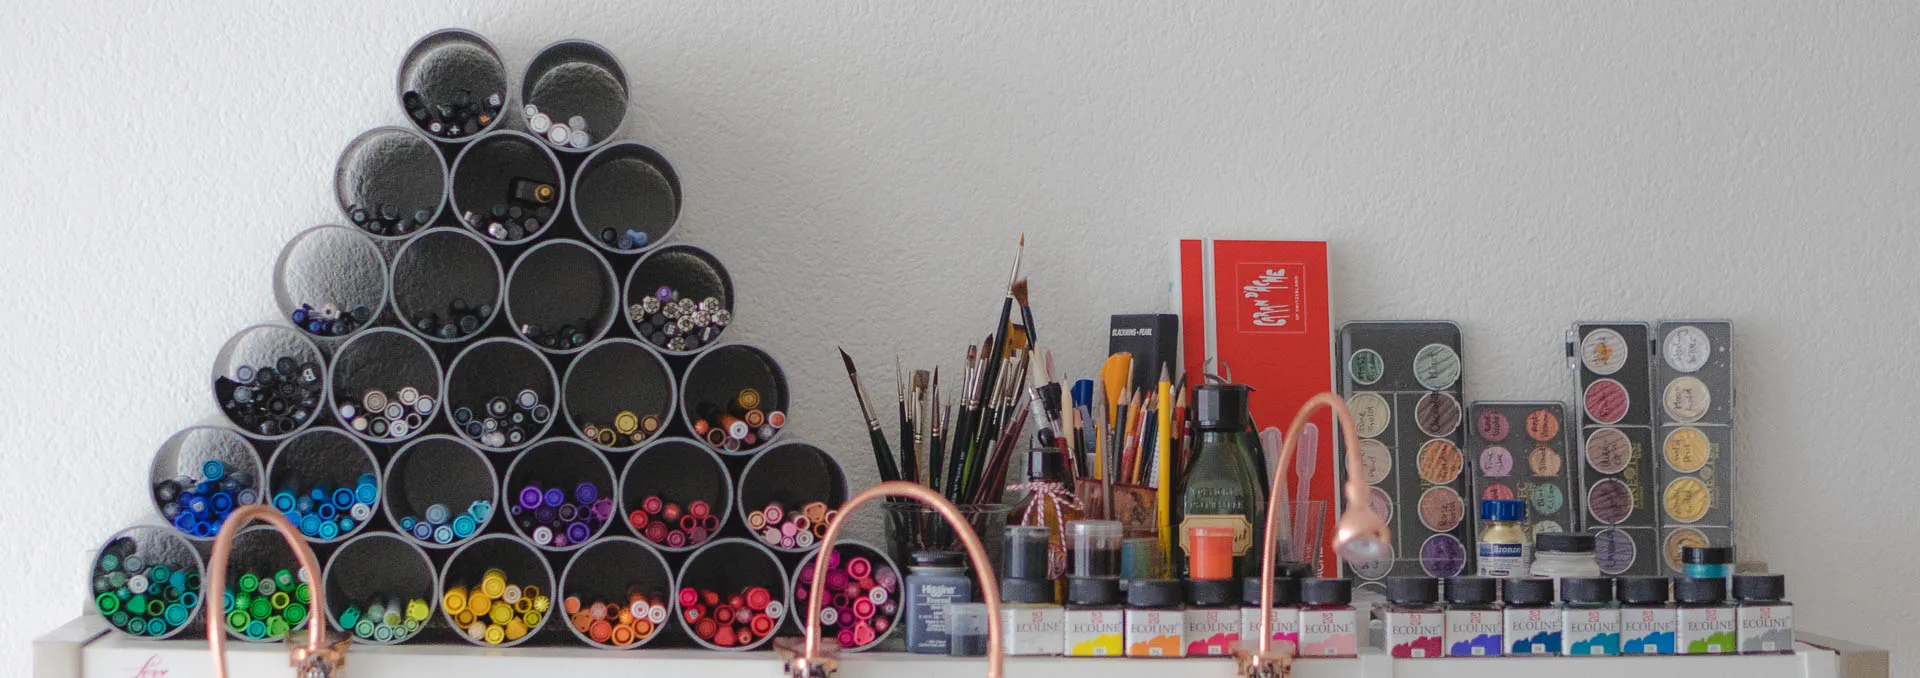
AssemblyMy first idea was to glue the pieces together in smaller pyramid shapes and then stack them. I knew that I didn’t want to glue every single piece together because I wanted to be able to modify the shape and extend it if I want. So I started with those little pyramids by gluing together units of 2 pipes and 3 pipes, and leaving the top of each single. And by that point I had burned my finger on the glue gun and all I wanted to do was stack this thing, so I actually skipped more gluing and built my large pyramid with the different units I had. I think if you distribute the weight of the pens well you might get away with no gluing at all. I’d say I went the minimal gluing route but I am actually quite happy I did because I feel like this will make moving this a lot easier and changing the stacking shape is easier that way too.
I almost got a triangle, but I was short of one piece, so it’s an almost complete triangle.
Filling
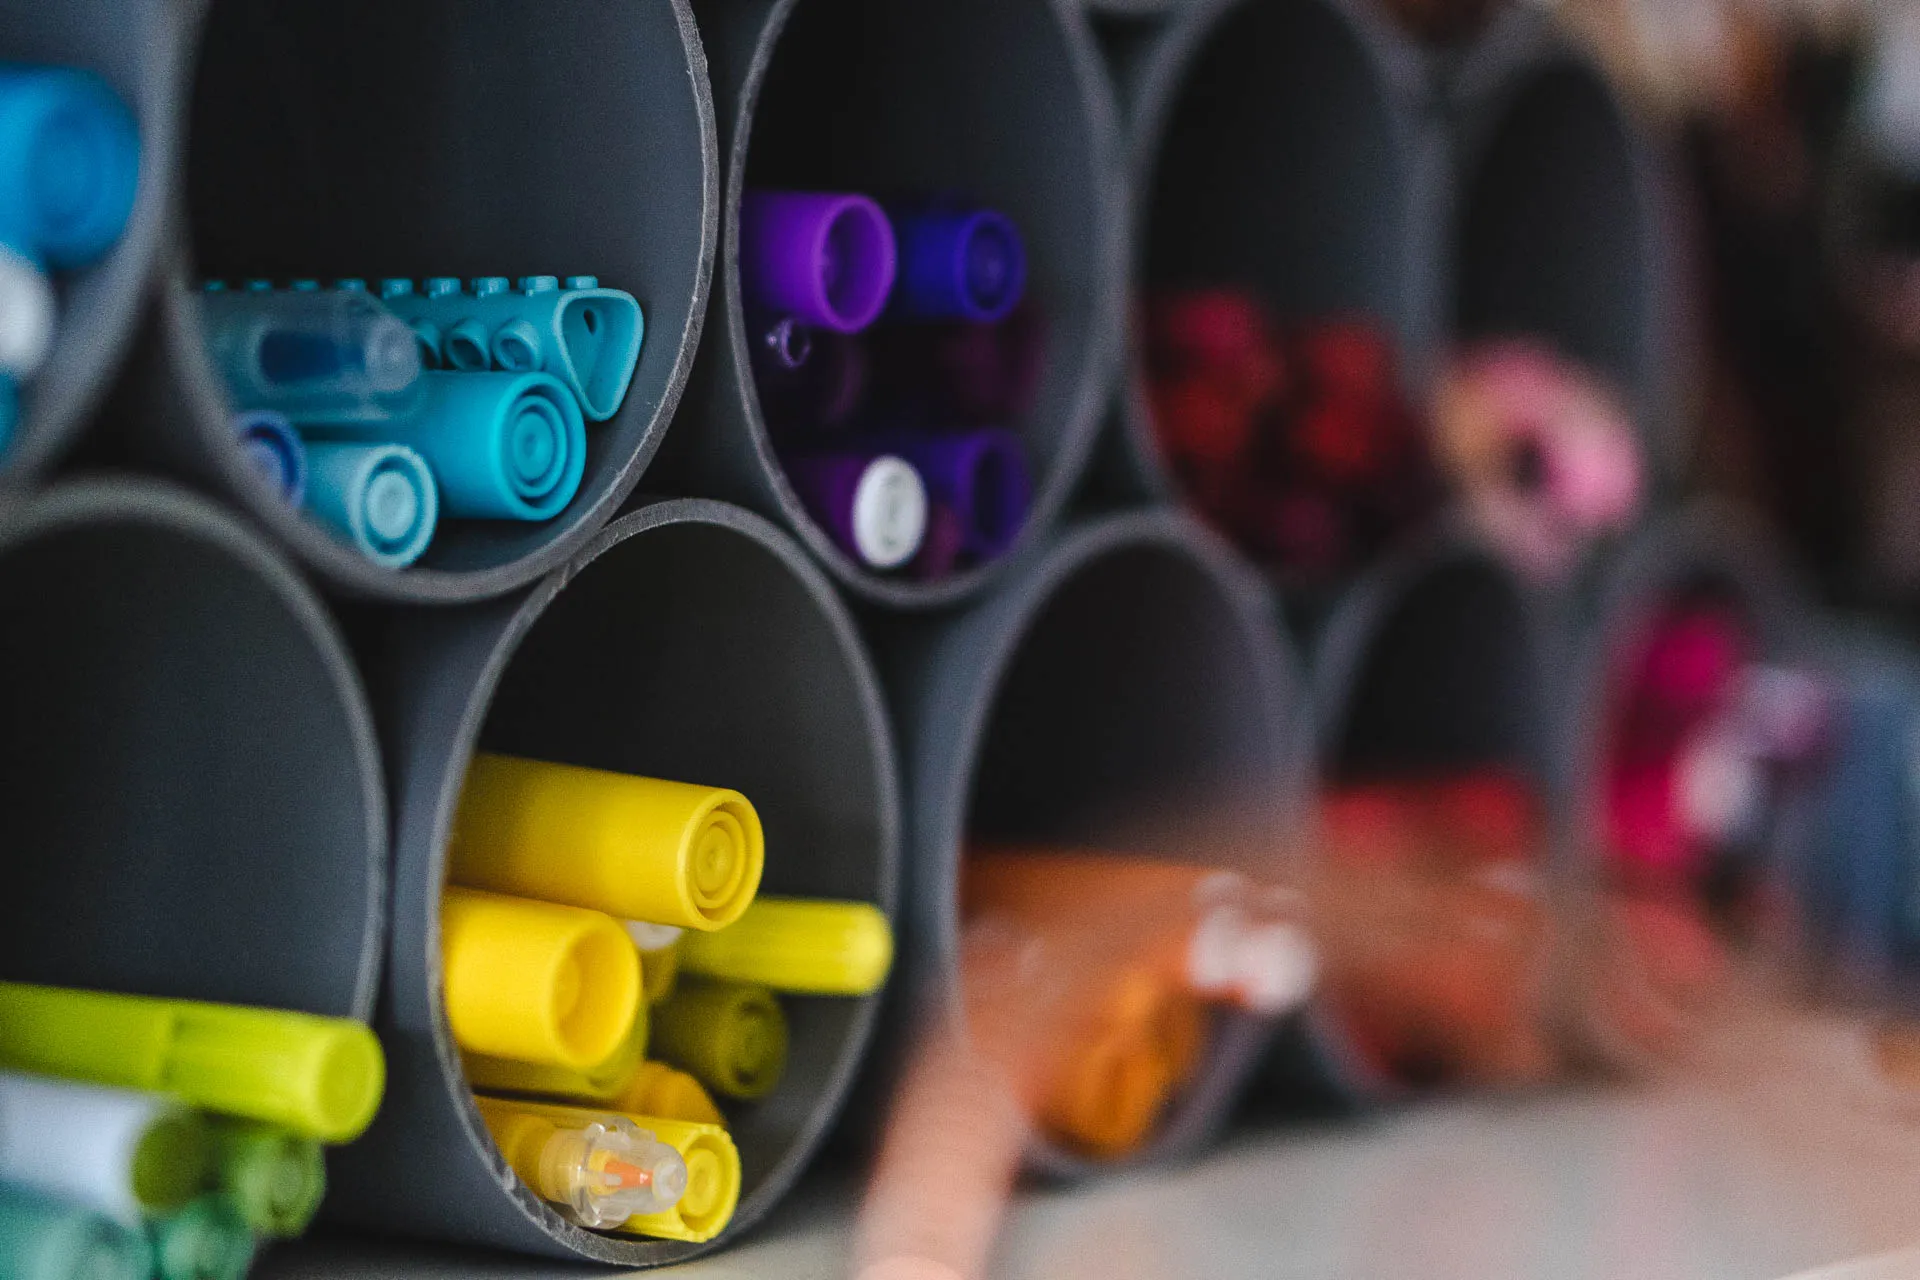
FillingFor the organizing of my pens, I had all of these in cups, where I had sorted them by type. For this one I went to organize them by color (and then do a bit more organizing with all the black pens into fude pens, bristled pens, bullet tips, microns etc). Organizing them by color meant that I got to really see how many pens I have and ever since I built this tower I find myself using a lot more of the pens I often had forgotten about before.
As for weight distribution I made sure that the tubes with most pens inside stayed at the bottom, to ensure that the weight of the top, wouldn’t bring the lower units to roll off, since it is not all completely glued together. If you do a full glue job, you shouldn’t have to worry about the weight too much.
Final Thoughts
Final ThoughtsThe tower is awesome, I love how it holds and displays my pens vertically. It took about 3h of work putting it all together, that was distributed over a weekend and cost me under 35chf which I think is a great price, considering that some vertical pen racks or little cupboard thingies cost up to 40 for really small ones. It was a very easy DIY to put together and I am really happy with the outcome, I recommend it to everyone with a lot of pens!