So I’ve realized there aren’t really any tutorials on how to create calligraphy guidesheets in Adobe Illustrator (I use CC).
There are different ways to get a PDF of guide sheets, there’s an online generator I’ve used before to get the guidesheets you can download in my freebies section, but in the end I did turn to Illustrator to create my guides, because it’s easier to adjust, add text to it, change the paper size, etc. So here’s how to do it.
And we’ll only draw 4 paths for this to create the most adjustable and fastest guide sheet you’ve ever drawn.
Videos
VideosSo there is a video for each of the things I’ll explain.
I tried going slow and not using the keyboard shortcuts for all the windows as they don’t show up on screen, so this should be fairly clear without the instructions.
Creating the Guides
Creating the GuidesAdjusting the guides & Turning the Lines into Illustrator Guides
Adjusting the guides & Turning the Lines into Illustrator GuidesPage Setup
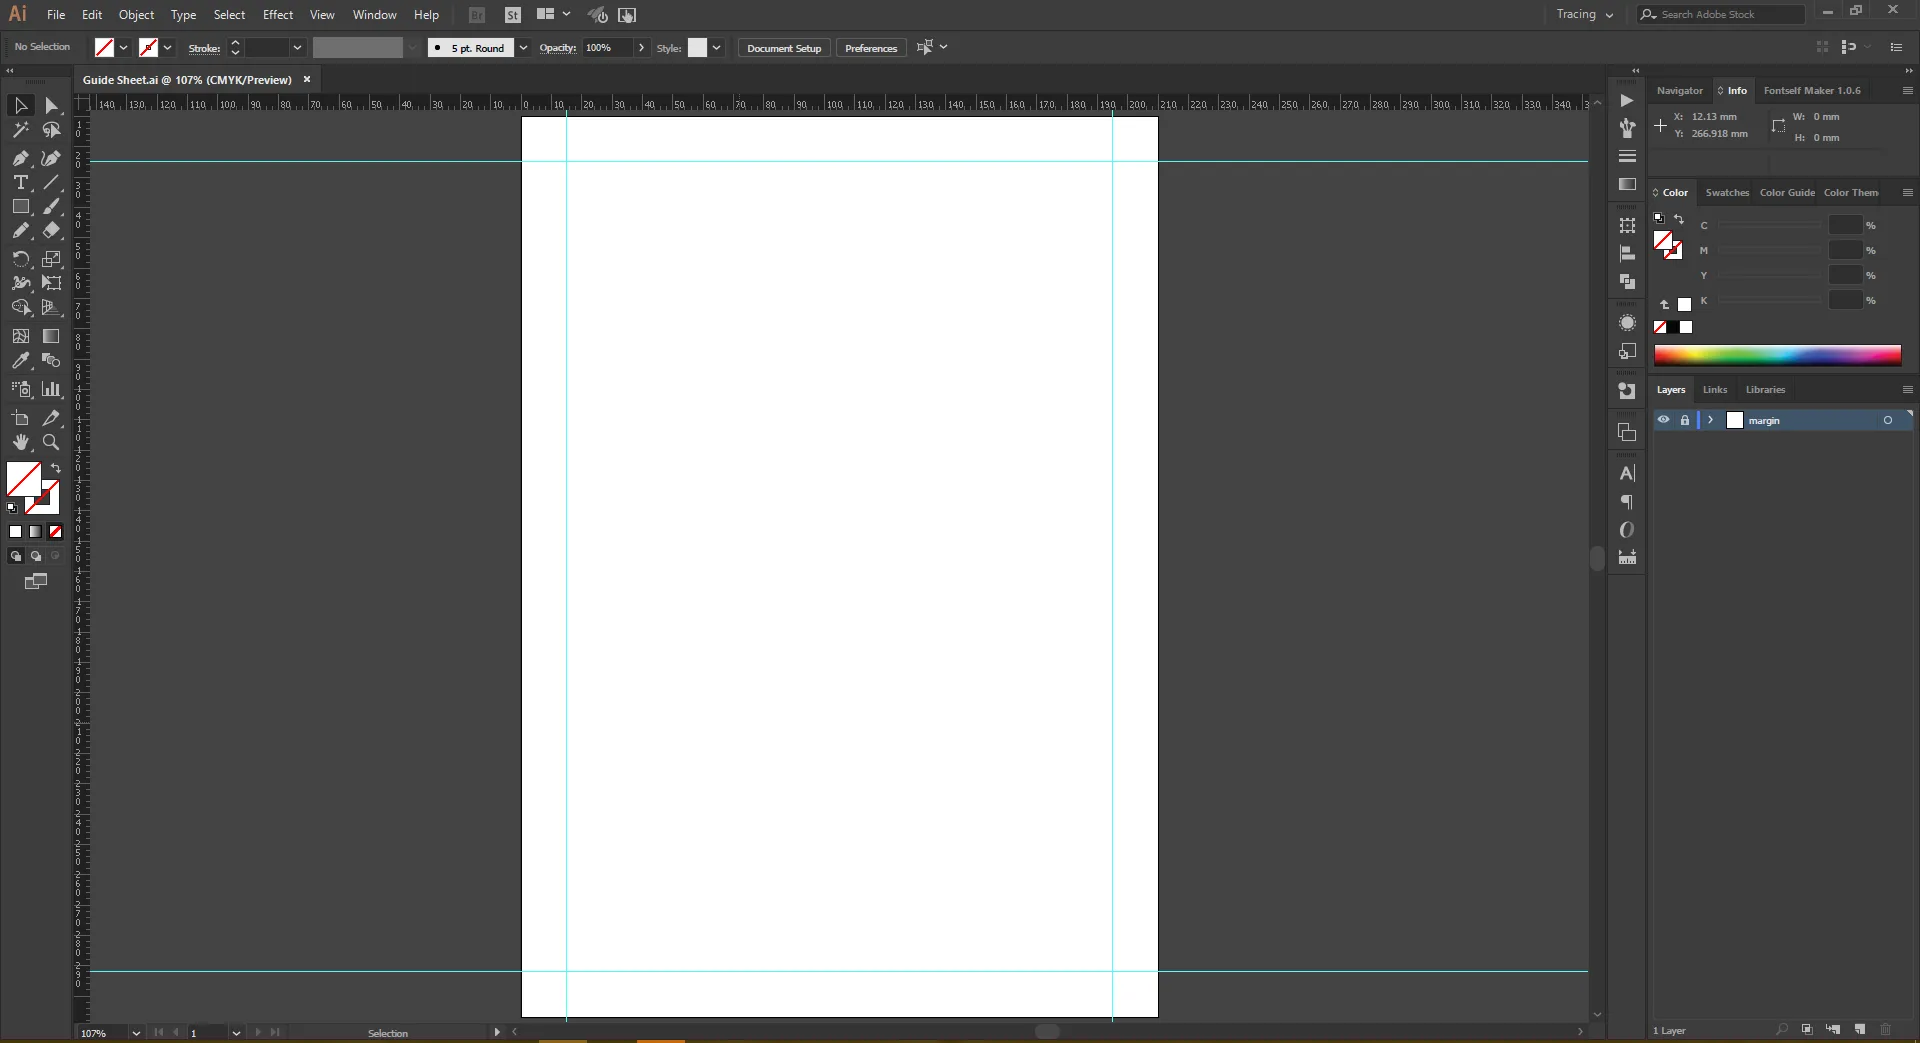
Page SetupThe first thing you want to do is set your document and add some gutter lines. Unfortunately this is not as simple as it is in InDesign, but since me and InDesign don’t work at all and the rest of this setup is way easier, we stick with Illustrator.
I created an A4 document from the Preset. So A4, CMYK, 300dpi. You want to go with the size you print in obviously.
Then we want to add some guides for our margins. It depends how large the printable area of your printer is. If you don’t know and have word here’s a quick tip: Set all margins to 0, then word will tell you that this might be outside the printable area. Hit the fix button and the margins are set to the printable area. For me it’s left & right: 0 and top & bottom .35cm.
I usually set my margins to about 15mm. I have my units at mm, you can set them in Illustraor at Edit > Preferences > Units (Windows) or Illustrator > Preferences > Units (Mac OS).
Okay, so you want to start by making your ruler visible in case it’s not there yet (Ctrl+R · Cmd+R) and then drag two vertical and two horizontal guides into your artboard.
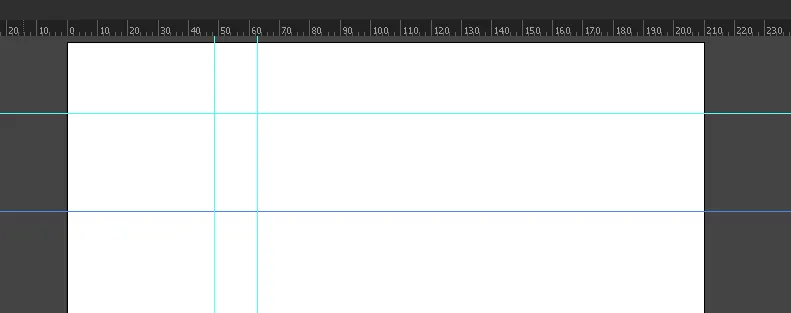
Then you want to select the first of the vertical ones, and open the transform panel (Shift+f8). In that panel you want to set the X value to the margin you want. 15mm in my case.
Select the second vertical guide and set the X value the full width of your page - the width of your margin. So in my case 210mm - 15mm = 195mm.
For the horizontal ones you do the same thing. But this time set the Y value to the margin and the height - margin for the second one.
Then we have our margin set. I usually keep these on a separate layer I call margin and I lock that layer, so the guides can no longer be moved.
Okay, let’s get started on the actual guides.
Main Lines
Main LinesCreate a new layer and drag a horizontal line from the left margin to the right. Make sure to hit shift while dragging it so it ends up straight.
Okay, now you want to basically make up the design of your guides and get your measurements. We’ll do some math now.
So for me I want to create some Copperplate Guidesheets using a 1.5:1:1.5 ratio. It is more common for English Roundhand, Engrosser’s usually uses a 2:1:2 ratio. What I also need in my guidesheets is a dashed or dotted line in between each of those lines, to get some orientation as to where to dot my i and how far up the t goes.
My go to x-height is 5mm. So I’ll need 4 full lines 5mm apart from each other and 5 dashed or dotted lines threaded in between.
Here’s how to do that.
Select your line and then go to Effect>Distort & Transform>Transform. In the move section add your x-height to the vertical slider. Create 3 copies. I always hit preview to check it’s actually what I want.
Middle Lines
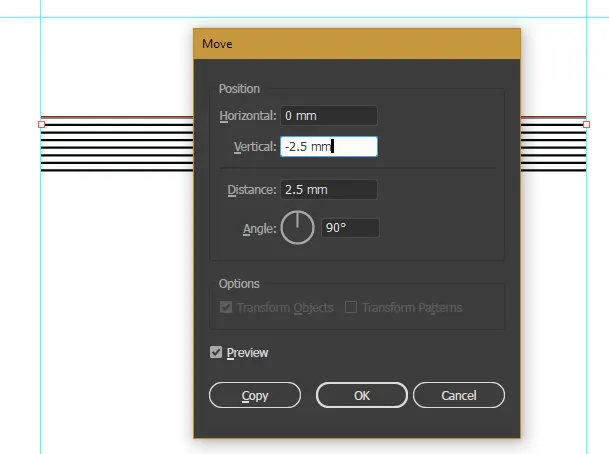
Middle LinesOnce we got that, duplicate this using Ctrl+C (Cmd+C for Mac), Ctrl+F (Cmd+F) to paste in place. Then hit enter. This opens the move window.
Enter negative half of your x-height into the vertical input. and hit okay.
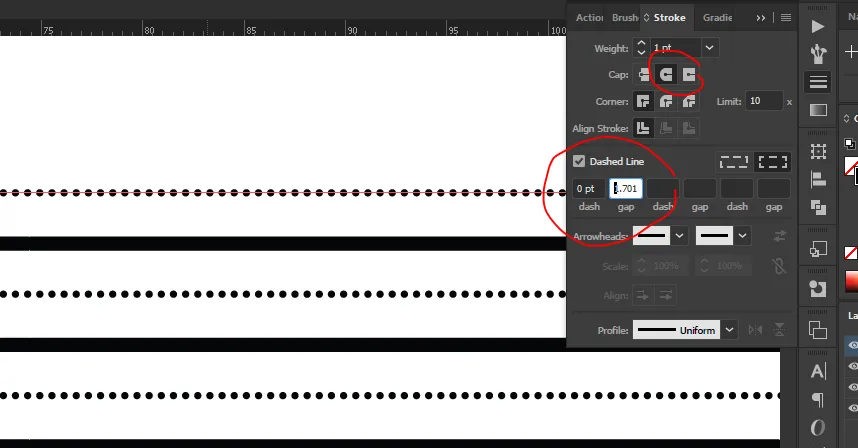
Keep that selected, open the Strokes panel (Ctrl+f10 · Cmd+f10). And create a dashed line how you want it. If you prefer dots like me, choose round caps, set dash to 0 and gap to something you like. I went with .6mm You can add mm units, it’ll just be converted to pt once you hit enter. As you can see, this is applied to all of the lines. But we have one dotted line missing.
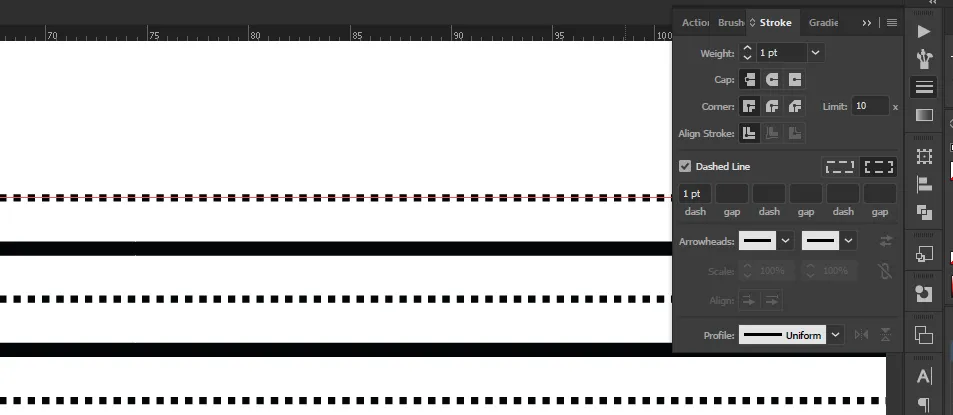
To add one more, we just need to add a copy. For that open the Appereance Window (Shift+f6), look for transform and tap the fx symbol to edit the effect. Just add a copy and hit okay.

So that’s the basic done, now for the slant guides.
Slant Lines
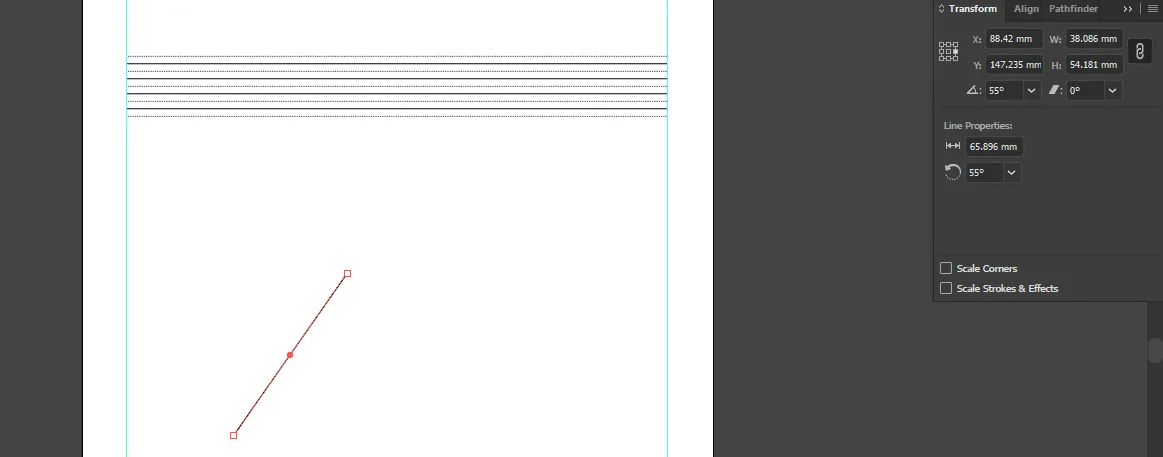
Slant LinesDraw a vertical line with the line secment tool. Hit shift again so it ends up straight. Now open the transform panel (shift+f8) and enter the slant you want. I’ll go with 55°.
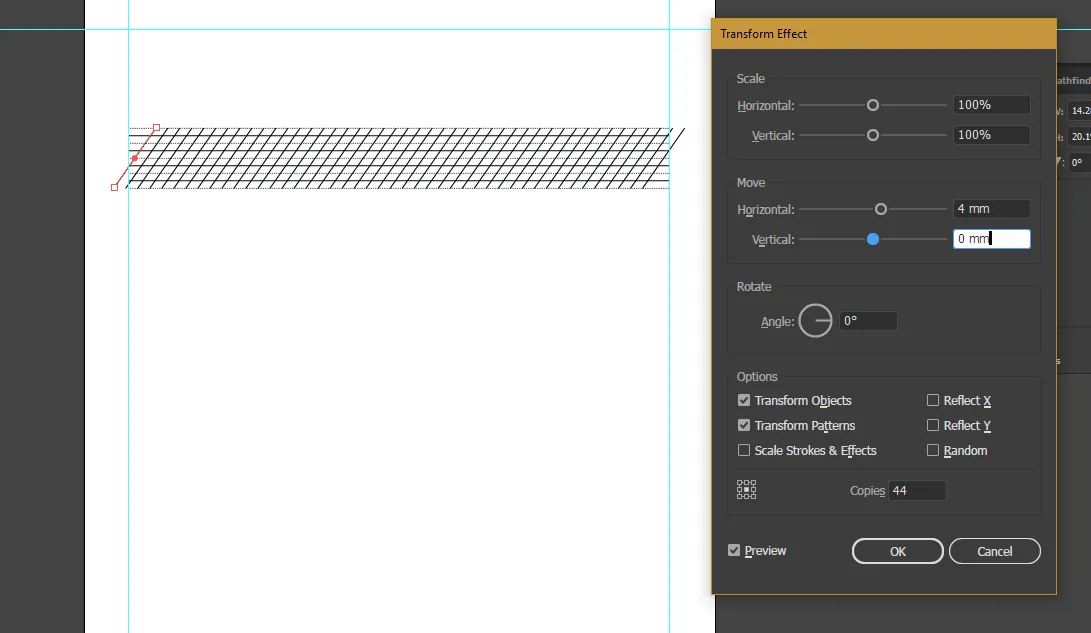
Position that on your guidelines, make it shorter in case you made the line too long. And then we’ll apply the transform effect again.
I like my slant guides quite tight at 4mm it makes it easier to keep my letters more or less even. For me that needed 44 copies.
And then edit the line however you want it.
Base Line
Base LineWhat I like to do is have a thicker base line. So you could just turn all of these transformed effects into paths, but for the sake of editability I’ll usually just add a path on top of it, that’s a bit thicker.
Fill the Page
Fill the PageOkay, we made one line. How do we get the full page? The transform effect!
For that, start by grouping all of the elements we currently have (Select & Ctrl+G · Cmd+G). Then put the line where you want the first line to be. I added a text where I can put the date because I like to add that to my practice sheets.
Okay, you’ll need to know the full height of your line, for me that’s 20mm, then add the gutter you want between lines and apply the effect.
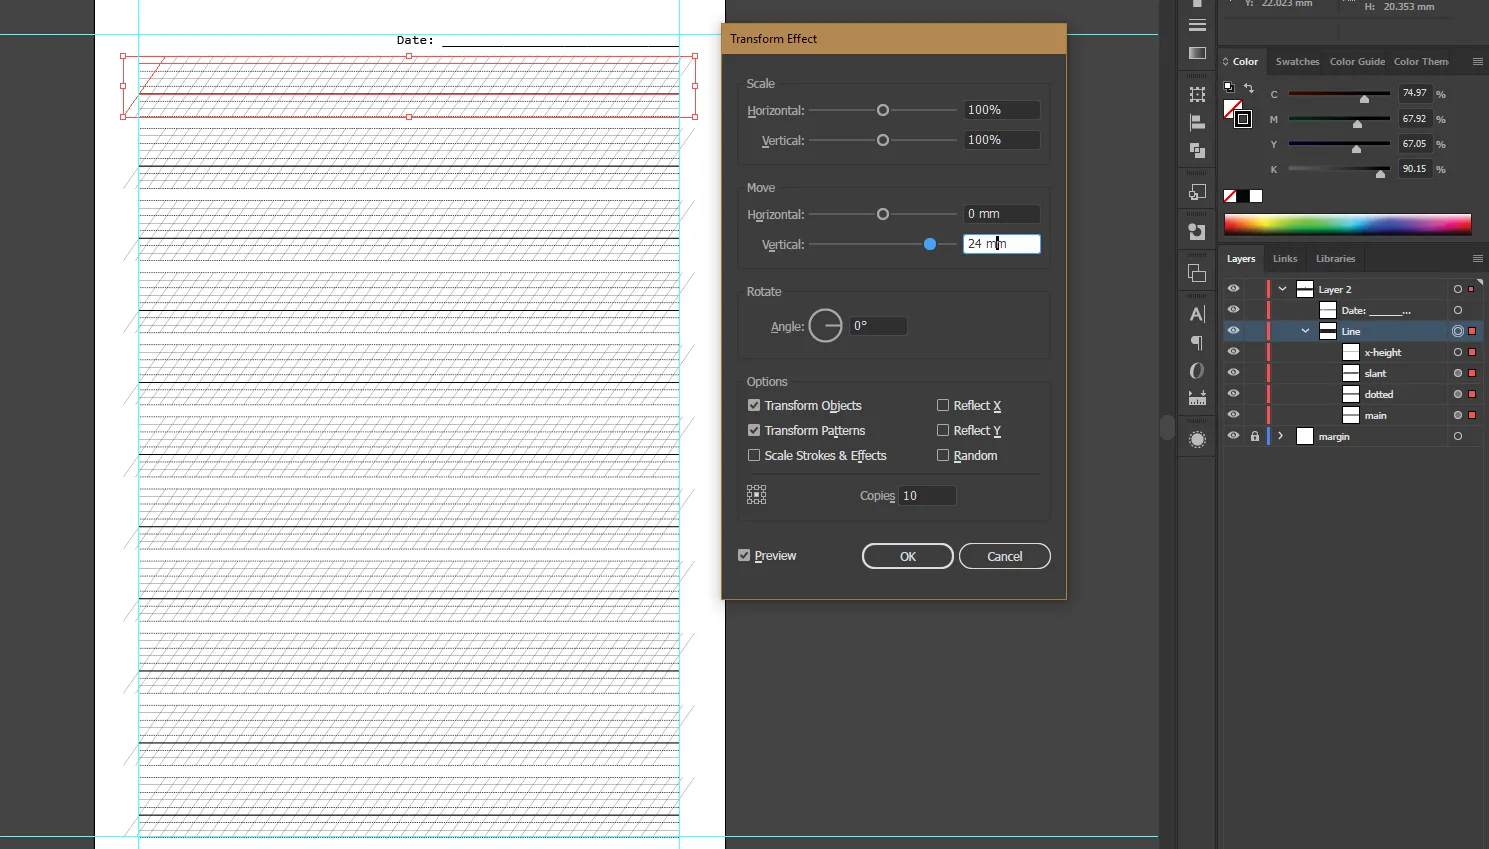
And that’s it.
This is the version I find to be the fastest to adjust.
Extra: Adjusting for another x-Height
Extra: Adjusting for another x-HeightI’ll quickly walk you over the adjustments so you see how simple it is.
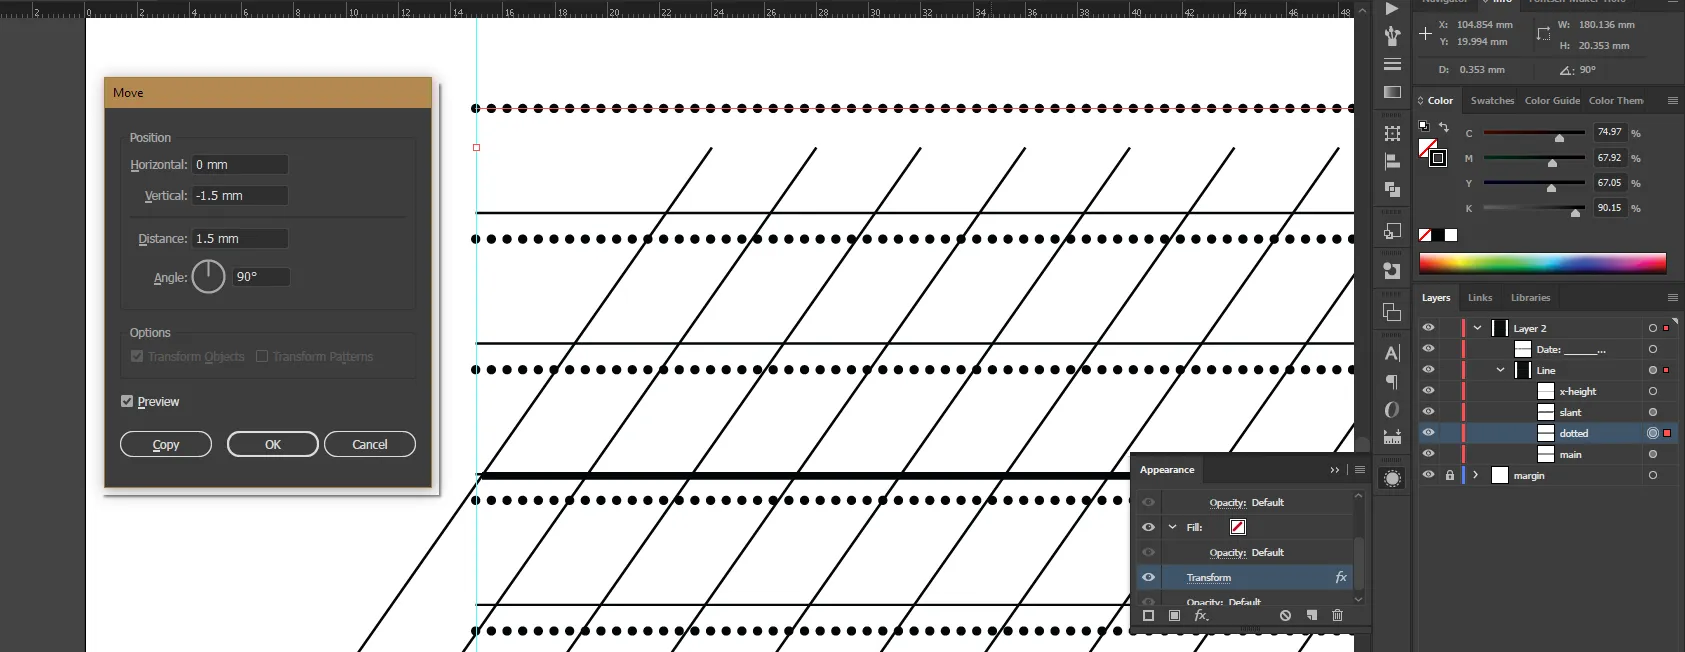
start with the main lines, so the full strokes. Open the Apeareance panel and edit the transform effect by double clicking the fx symbol. I’ll adjust my x-height from 5mm to 8mm.
Once you edited the main lines, select the dotted lines. Hit the enter key. In the move window, you want to move it up by the amount of change. So we started with 5mm, went to 8mm. The lines are in between, so half of 5 is 2.5, half of 8 is 4. 4-2.5 = 1.5 So we need to move the line 1.5mm up.
Then edit the transform effect of the dotted lines.
I’d then edit the main transform effect otherwise it’ll be quite the chaos. The height of the lines is now 4 * 8 = 32mm.

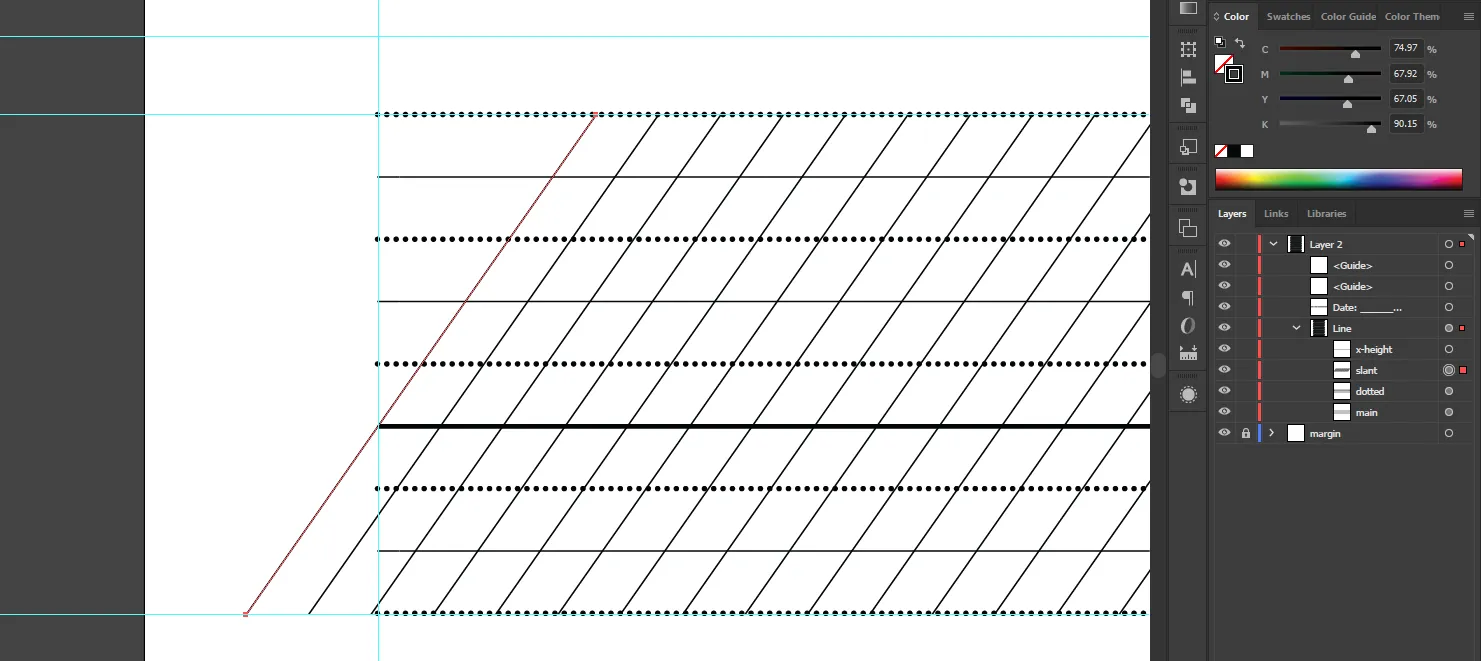
Reposition the x-height if you use one. And then fix the slant by making it longer. I position it so that it touches the x-height at the beginning, then drag two guides at top and bottom and make the line longer so it touches those guides.
In case of the 8mm, I’d also go and adjust my slant spacing because for 8mm lines, the letters will be wider as well.
Extra: Turn this into Illustrator Guides
Extra: Turn this into Illustrator GuidesIf you are working digitally and need those lines as acutal guides, there’s a super simple way on how to do that.
First you have to flatten those effects, so turning them into paths. Do that using Object>Expand Appereance. Then turn this into guides using Ctrl+5 · Cmd+5 or View>Guides>Make Guides.
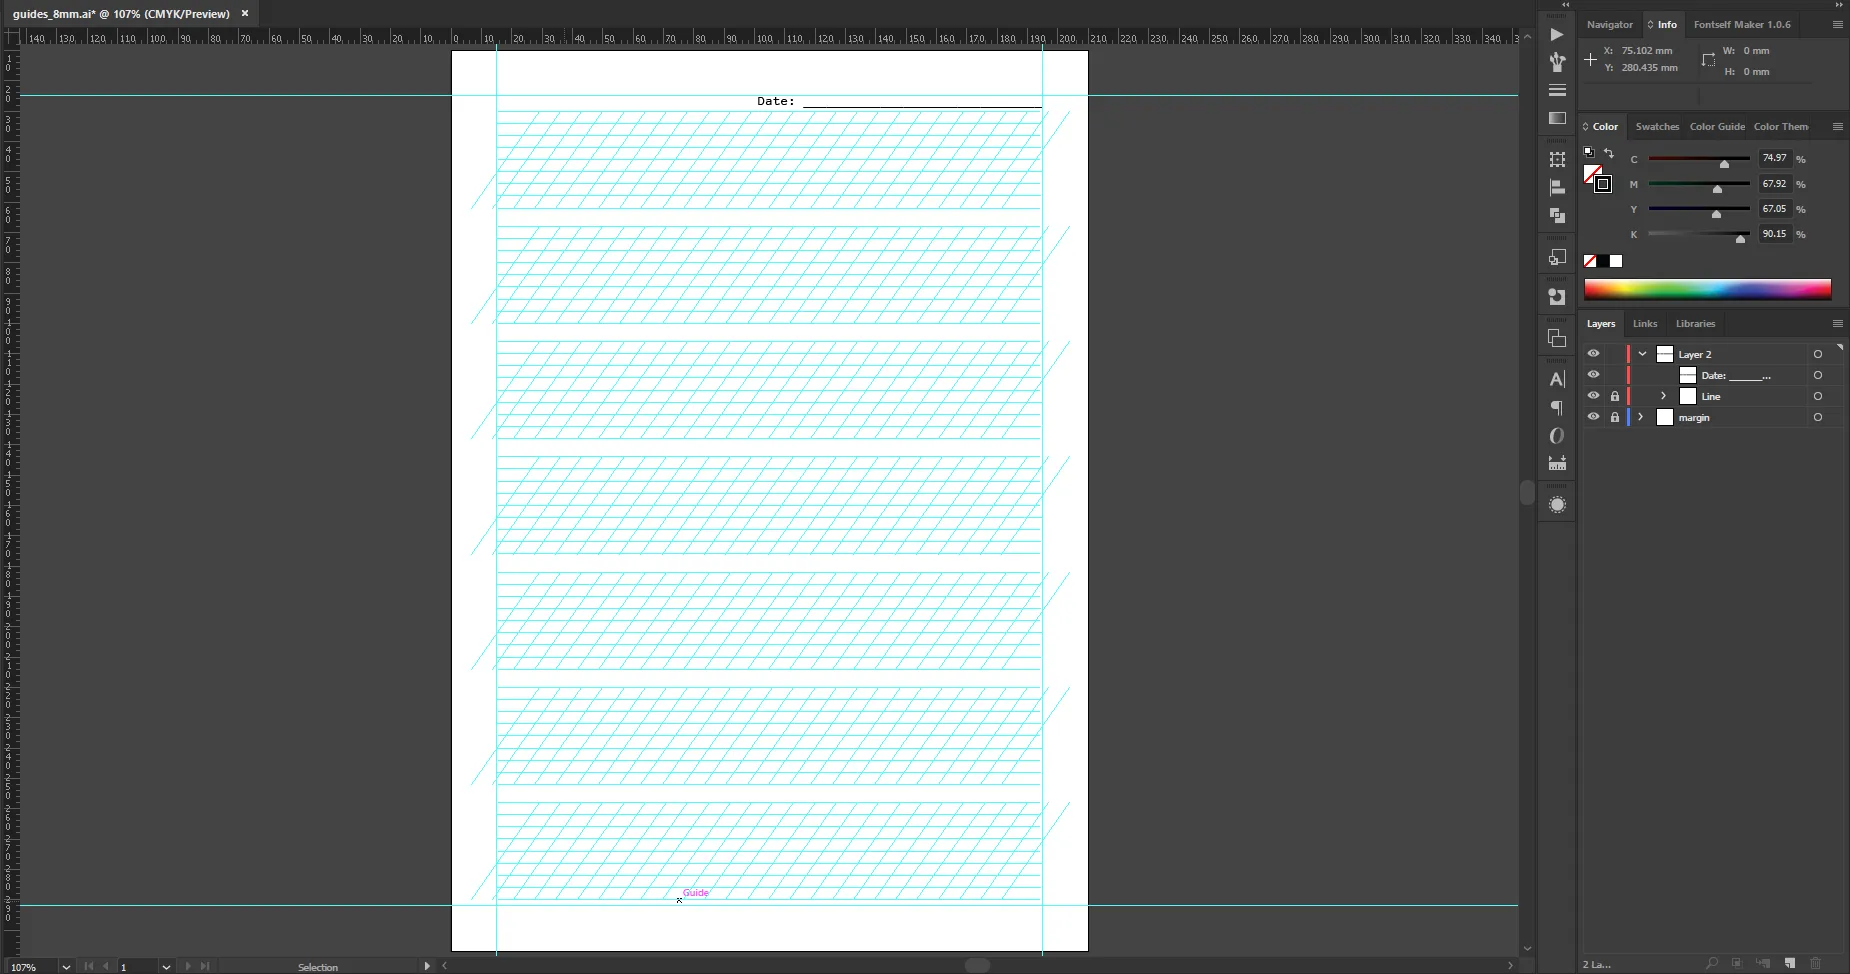
That’s all there is to it, super easy.