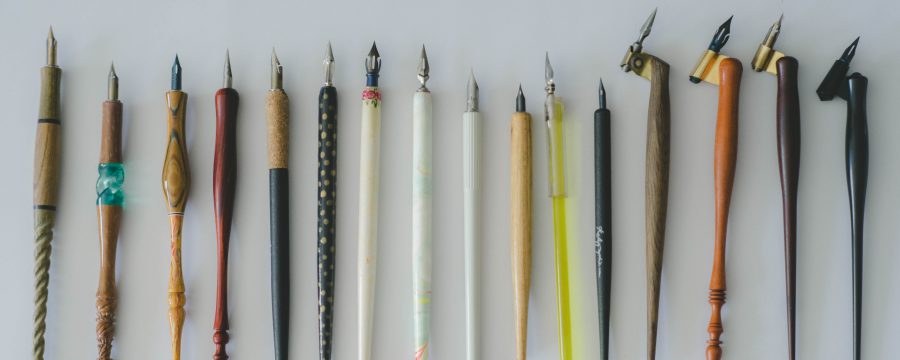
I have been getting quite a few questions on Instagram on the different ways I create my lettering videos. I have been promising you guys this Post for a while, so here it finally is. I hope this will answer all of your questions and help you guys out.
Before we jump into it
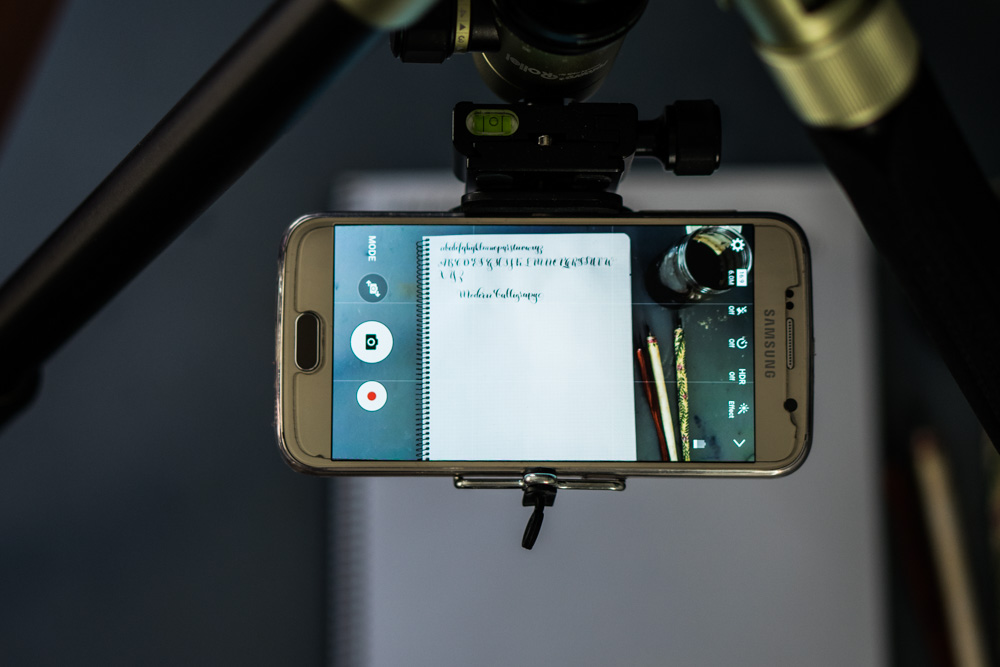
Okay, so first things first, let’s talk about the camera. Obviously you’ll need a smartphone for this and the quality of your videos will depend on this. I chose my phone based on the camera capabilities when I had to get a new one last year. The phone I use is the Samsung Galaxy S6. Especially my editing workflow is pretty Samsung specific since I haven’t found an editing App that works as nicely as the one that ships with the phone, but I did look for some alternatives and will make some suggestions, also for you iOS guys out there. Okay, let’s get on.
The Helpers
When you first get into Instagram and the whole art/lettering community you will be fascinated by the video quality some people get. Well, some use actual cameras and tripods, I have given this method a try once in a while, but even after getting my beloved Sony a7 II I still use my phone for about 95% of my lettering videos. The reason is simple: I don’t like to involve my computer for a video that only lasts a few seconds, and the camera does not allow me to transfer the video files via Wifi, just the photos.
I will sometimes use Adobe Premiere Pro to edit timelapses, but I will not cover the edit of these videos in this post.
Okay, so let’s talk about the actual helpers that make a good Instagram video: “Tripods”.
First lesson to learn: Handholding will not help you in the creation of good videos. You will find handheld videos on my account. The reason being that I had an idea and I had to capture it on the go, when I didn’t have any access to something to hold up my phone. But actually you can use pretty much anything. I have found some very cool hacks around the internet. Just give it a google, it’s crazy what people can come up with!
Yet some of the props and actual tripod tools work better than others. In this guide I want to show you behind the scenes looks of my most used camera angles, and all of these are actually super low budget.
Desk Setup
Before jumping into lettering consider your desk setup. Obviously we talk table top filming in this post so make sure you have some kind of table, it’s best if you have it close to a window where natural light can flow in. I know, natural light is something I will fight with especially in Winter time. If you are working or a student you will most probably only have time for lettering after dark most of the time but the optimal setting is natural light. I have two different options in my small one bedroom apartment. An actual desk with the window on the right and a mobile fold-away table that I usually put right in front of my window. I used to work exclusively on the fold-away table, since my actual desk is my “real” work station where I can plug my laptop to an additional monitor, print stuff and organize work. I kinda changed that after hanging a shelf above my desk. This shelf is now helping in the filming of my overhead shots, which is my favorite camera position, so I will film mostly on my crammed desk now.
“Tripods”
Let’s get into the actual “tripods” I use.
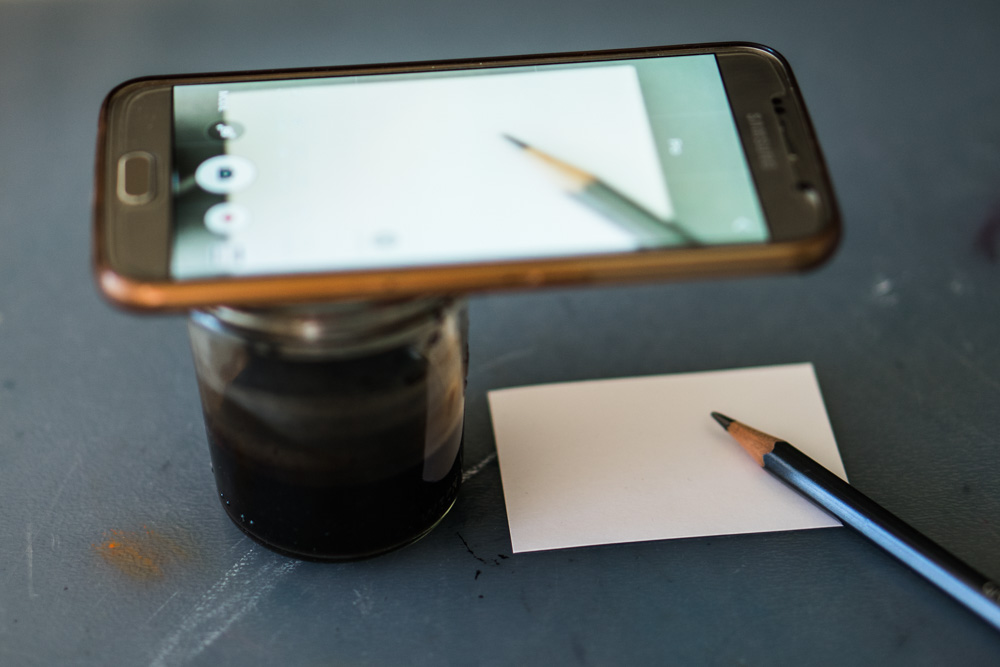
Glasses
Yes, you read that right. Before I got any other tool I used to put my phone on a glass. Some glasses work better than others but they will get the job done for small lettering pieces. You will have some of the glass in the picture sometimes, but since Instagram works with square images you can ignore that.
Setup
Example Video
Mini Tripod · Link
I got this MPod Mini Stand when I was in Berlin for a study week a while ago. Since then this is my ultimate travel tripod. It is tiny so it even fits in some small handbag. There are bigger Versions, like the original GorillaPod, but the store had only this tiny one, and I am very happy with it. My Galaxy is probably the biggest phone that will fit comfortably into this tripod, so if you have a bigger phone it might not fit in there.
The angle of this tripod will not be overhead so the look is different. I like to switch it up sometimes and find it quite fun.
Setup

Example Video
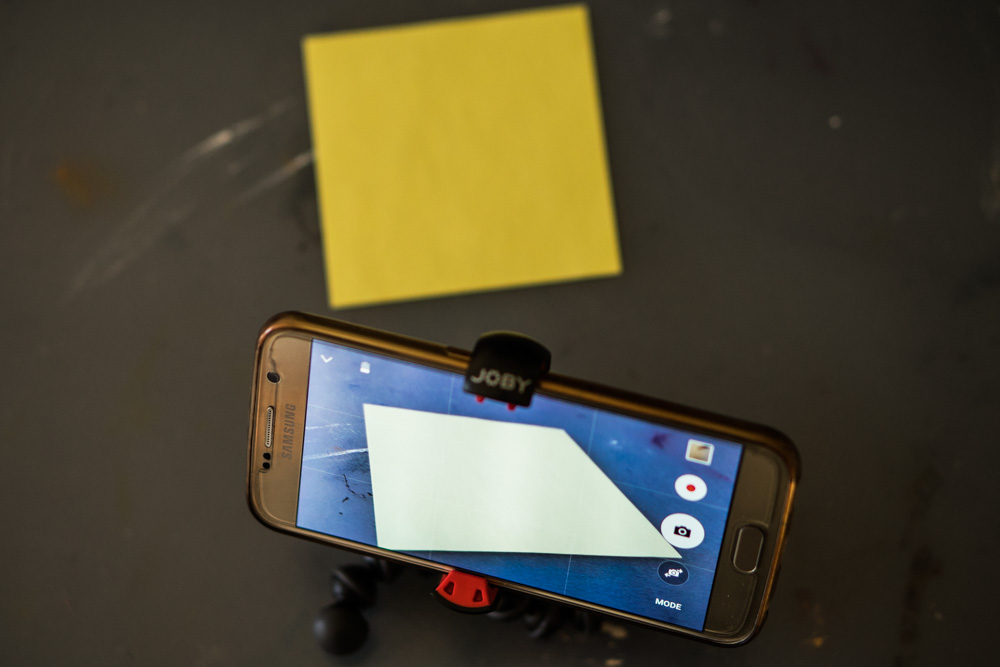
Phone Clamp · Link 1 · Link2
I adore this thing. I attach this camera clamp above my desk onto my shelf which reduces the bounce it might get. If you attach it to the desk you are working on the video will sometimes end up a little shaky, but it works. I think this setup is fantastic because it is super flexible, no tripod you might accidentally knock over and filming from overhead means there is no distortion of the word. I love this for timelapses and bigger lettering. The reviews on this are not the best, and yes, it is not super hight quality whatsoever. I’ve had it for almost a year and I use it a lot, it suits my purpose and I choose this over my tripod, which was more than 10x more expensive.
Update so only a few days after writing this my clamp broke. It lasted me 9 months of use, so I’d definitely say it was worth its price. But since I got mine from amazon they added a shipping price which would be 17 dollars to Switzerland. So I ordered one from ebay, looks the same, costs even less and it’s gonna be pink. I haven’t gotten it yet, but will let you know if the quality is different from the amazon one once it arrives from China.
Setup


Example Video
Phone Holder for Tripod · Phone Holder & Tripod
Okay, this is only an option if you own a tripod (I added the link to my tripod as well in case you’re interested) I hardly ever use my tripod with this phone holder because the tripod keeps getting in the way and I am just too lazy most of the time to get it out just for a short video, so that is the main reason. I would not recommend you get an actual tripod for instagram videos if you don’t intend to use an actual camera, because it takes quite some hassle. I don’t really see a difference in the result.
Setup
Obviously you would not draw the curtains for filming, but taking a picture with the sun in the background did not work.


Example Video
Camera Settings
My phone comes with a “pro mode” which basically means that you can set shutter speed, ISO and white balanche manually. I definitely recommend using these settings, especially when working in non-natural light. I have yet to figure out the optimal lighting situation but by fixing the white balance you can at least fix some stuff. If you are not familiar with setting a white balance and shutter speed I recommend researching some tutorials on it, there are some very good ones online, that will be way better at explaining it than I’d be.
Editing
I do pretty minimal editing on my Instagram Videos. I will usually use the video editor that comes with the Samsung (unfortunately only works on Samsung), it is fantastic and lets you rotate videos in a breeze, which is what I have to do quite often. Also shortening and maybe add a photo in the end are super easy. It also gives you the option to speed the video up 2x speed, which is enough most of the time for me. If I take a longer video I will use the Hyperlapse App from Microsoft. Another App I have found to be working pretty nicely is PicPlayPost(Android, iOS, Windows), the free version will put a watermark on your videos but the pro version is pretty inexpensive, it allows you to remove the watermark or replace it with your own. I have also used Adobe Premiere Clip at some point, but I usually just stick to Premiere on my Computer and leave the app unused.
If you would like me to do an in-depth tutorial on my video editing process let me know and I can post that. I hope that helped you guys out and answered some of your questions.